Handling Vectors in AI Context via PostgreSQL pgVector

by Horatiu Dan

Relational databases are optimized for storing and querying structured data, yet most of the data today is unstructured. Artificial Intelligence and Machine Learning are now able to “structure” pieces of unstructured data without altering its semantics. First, they transform it ‘conveniently’ into arrays of numbers, structures that are called vectors. Then, the vectors are stored into dedicated databases and worked upon as needed, so that the initial data becomes useful and meaningful as part of a high-dimensional space.

In AI context, the numerical arrays are called vector embeddings and can be seen as sets of “characteristics” of the represented entities (objects). Their role is to allow AI models to infer on them and consequently on the initial input data.

This article is an introduction on how to turn PostgreSQL into a vector database using the pgVector extension. It also briefly presents a few general vector similarity concepts, concepts that are relevant particularly in AI applications.

Concepts

As developers become more and more interested in constructing AI functionalities (or exploring them), it is useful and helpful to have a basic understanding of the concepts around vectors in a multi-dimensional space. Moreover, when using techniques as Retrieval Augmentation Generation (RAG) where vector embeddings enrich the AI context to fulfill the user’s inquiries, this basic understanding becomes a prerequisite.

In general, Large Language Models (LLMs) are stateless, and it isn’t seldom when the responses they give to prompts are not satisfactory. In order to enhance their capabilities, they are improved with “state” represented as vector embeddings. It is said that this state is used to provide LLMs with “a long-term memory” so that the possibility of them hallucinating decreases. Basically, when a prompt is provided to a model, in case the results are not satisfactory, one may “help” it with relevant pieces of information – embeddings – extracted from the self vector databases.

For accomplishing this, at least two preconditions are needed:

  • gather the data, transform it into vector embeddings and have it stored into the database
  • when needed, quickly find the vectors related to the ones in the prompt and “hand” it to the model to use it

The former step represents the “magical” operation through which an ML model accepts text as input and through vectorization, transforms it into vectors. The latter is accomplished by leveraging the features offered by the chosen vector database.

When it comes to vector databases, there are quite a bunch of implementations available. A few are mentioned below.

  • PostgreSQL pgVector – in this article
  • AzureVector
  • ChromaVector
  • MilvusVector
  • Neo4jVector
  • PineconeVector
  • QdrantVector
  • RedisVector
  • WeaviateVector

According to OpenAI, “the distance between two vectors measures their relatedness. Small distances suggest high relatedness and large distances suggest low relatedness.”

With this definition in mind, it is said that the similarity of two objects is the distance between their vector representations using a specific metric (method).

The “theory” defines several such metrics:

  • L1 distance (Manhattan)
  • L2 squared distance (Euclidian)
  • dot product
  • cosine distance / similarity
  • Hamming distance

Choosing a certain metric depends on several factors, yet this aspect won’t be detailed as part of this article. Nevertheless, as the pgVector extension currently supports L2, dot product and cosine distance / similarity metrics, these are the ones analyzed next.

Installing pgVector

As of now, PostgreSQL does not support vector similarity search natively. In order to accommodate such a feature, the pgVector extension may be added. According to the documentation, one needs to perform a few simple steps [Resource 1].

Personally, I used an existing PostgreSQL 13.11 server running on Windows OS and I enhanced it with vector support by compiling, installing and enabling the extension afterwards.

Steps:

  • install Visual Studio 2022 with C++ support, available here
  • run vcvars64.bat, located in Microsoft Visual Studio\2022\Community\VC\Auxiliary\Build\ directory
  • set PGROOT to point to the current PostgreSQL
>set "PGROOT=C:\Program Files\PostgreSQL13"
  • get the pgVector source code
>git clone --branch v0.6.2 https://github.com/pgvector/pgvector.git
  • go to the pgvector directory and run the make file using using nmake
>nmake /F Makefile.win
>nmake /F Makefile.win install
  • enable the extension using the next SQL command
create extension vector;

At this point, one shall be able to use a new data type in their tables – vector, store data as vectors and perform similarity search queries.

Querying Vectors in PostgreSQL

The way a Machine Learning model transforms the text into vectors (“the magic”) is not considered as part of this article. Thus, it is assumed that the vector embeddings exist, and they are ready to be stored into the database.

Let the following three sentences have the following representations. For convenience, a space with three dimensions is used.

'Raccoons are silly and funny.'   - [3,0,4]
'Dogs are friendly and helpful.'  - [5,0,2]
'Cats are funny and foxy.' 		   - [4,0,3]

Since the vectors are available, they can be stored. Prior to that, a new schema and a minimal table are created.

create schema vectors;

create table if not exists document (
    id integer primary key,
    name text not null,
    content text not null,
    embedding vector(3) not null
);

One may notice that the fourth column – embedding – and its vector data type. The parameter represents the number of dimensions, here 3.

insert into document
	values (1, 'Raccoons', 'Raccoons are silly and funny.', '[3,0,4]');

insert into document
    values (2, 'Dogs', 'Dogs are friendly and helpful.', '[5,0,2]');

insert into document
    values (3, 'Cats', 'Cats are funny and foxy.', '[4,0,3]');

The data is in, one mays start launching queries.

select * from document;
+--+--------+------------------------------+---------+
|id|name    |content                       |embedding|
+--+--------+------------------------------+---------+
|1 |Raccoons|Raccoons are silly and funny. |[3,0,4]  |
|2 |Dogs    |Dogs are friendly and helpful.|[5,0,2]  |
|3 |Cats    |Cats are funny and foxy.      |[4,0,3]  |
+--+--------+------------------------------+---------+

Metrics

Next, each of the metrics pgVector currently supports is analyzed. The context is simple.

Let’s consider, in addition to the three vector embeddings, a fourth one – [1,2,3]. As the focus is not on how a vector is produced, we could say it may mean anything. The aim is to find out how similar the stored vectors are with this one.

Graphically, the four vectors can be represented as below.

L2

L2 (Euclidian) squared distance between two vectors represents the straight-line distance between them.

The lower the distance, the more similar the vectors.

e.g. the L2 distance between [3,0,4] (“Raccoons are silly and funny.”) and [1,2,3] (our query) is

In PostgreSQL, the <-> operator computes the L2 distance.

select *, embedding <-> '[1,2,3]' as l2_distance
from document
order by l2_distance;
+--+--------+------------------------------+---------+-----------------+
|id|name    |content                       |embedding|l2_distance      |
+--+--------+------------------------------+---------+-----------------+
|1 |Raccoons|Raccoons are silly and funny. |[3,0,4]  |3                |
|3 |Cats    |Cats are funny and foxy.      |[4,0,3]  |3.605551275463989|
|2 |Dogs    |Dogs are friendly and helpful.|[5,0,2]  |4.58257569495584 |
+--+--------+------------------------------+---------+-----------------+

Dot Product

The dot product of two vectors is nothing but the scalar product between the two. The dot product distance between the vectors is the negative of their dot product.

The lower the distance, the more similar the vectors.

e.g. the dot product distance between [3,0,4] (“Raccoons are silly and funny.”) and [1,2,3] (our query) is:

In PostgreSQL, the <#> operator computes the dot product distance.

select *, embedding <#> '[1,2,3]' as dp_distance
from document
order by dp_distance;
+--+--------+------------------------------+---------+-----------+
|id|name    |content                       |embedding|dp_distance|
+--+--------+------------------------------+---------+-----------+
|1 |Raccoons|Raccoons are silly and funny. |[3,0,4]  |-15        |
|3 |Cats    |Cats are funny and foxy.      |[4,0,3]  |-13        |
|2 |Dogs    |Dogs are friendly and helpful.|[5,0,2]  |-11        |
+--+--------+------------------------------+---------+-----------+

Cosine Similarity / Distance

The cosine similarity between two vectors is the cosine of the angle between the two in the considered space.

The smaller the angle, the more similar the vectors. Also, it is said that similar vectors point towards the same direction.

The cosine distance is defined as the “complementary” of the cosine similarity.

The lower the distance (the bigger the cosine similarity), the more similar the vectors.

e.g. the cosine similarity and the cosine distance between [3,0,4] (“Raccoons are silly and funny.”) and [1,2,3] (our query) are:

In PostgreSQL, the <=> operator computes the cosine distance.

select *, embedding <=> '[1,2,3]' as cosine_distance
from document
order by cosine_distance;
+--+--------+------------------------------+---------+-------------------+
|id|name    |content                       |embedding|cosine_distance    |
+--+--------+------------------------------+---------+-------------------+
|1 |Raccoons|Raccoons are silly and funny. |[3,0,4]  |0.19821627426272692|
|3 |Cats    |Cats are funny and foxy.      |[4,0,3]  |0.30512077102769664|
|2 |Dogs    |Dogs are friendly and helpful.|[5,0,2]  |0.45407916631598844|
+--+--------+------------------------------+---------+-------------------+

As cosine distance and cosine similarity are opposite, when working with cosine similarity, the results need to be ordered descending if the aim is to find the more similar results.

select *, 1 - (embedding <=> '[1,2,3]') as cosine_similarity
from document
order by cosine_similarity desc;
+--+--------+------------------------------+---------+------------------+
|id|name    |content                       |embedding|cosine_similarity |
+--+--------+------------------------------+---------+------------------+
|1 |Raccoons|Raccoons are silly and funny. |[3,0,4]  |0.8017837257372731|
|3 |Cats    |Cats are funny and foxy.      |[4,0,3]  |0.6948792289723034|
|2 |Dogs    |Dogs are friendly and helpful.|[5,0,2]  |0.5459208336840116|
+--+--------+------------------------------+---------+------------------+

To conclude, the cosine similarity measures how similar two vectors are, while the cosine distance, how different they are.

Enhancing the Search Speed

In the previous section, the aim was to find the vector embeddings that are closer to the chosen query vector – [1,2,3] – by using a specified distance metric. In order for such queries to be usable, they need to be fast. According to the documentation [Resource 1], pgVector uses by default the exact nearest neighbor search (kNN algorithms), which retrieves the nearest k vectors after comparing the queried one with each embedding in the database.

The complexity of kNN algorithms is O(n), thus scanning vectors with 200-300 dimensions against a big number of embeddings is computationally very expensive and not scalable.

The alternative is the Approximate Nearest Neighbor (ANN) approach which trades accuracy for a great deal of improvement in speed. pgVector supports two implementations:

  • Hierarchical Navigable Small World (HNSW) – creates an index based on a proximity graph (related vectors are stored next to one another)
  • IVVFFlat – divides the vectors into lists and searches subsets of these that are closest to the queried one

There are plenty of details in the documentation [Resource 1] on how to parameterize, adjust and monitor “the progress” of the execution when creating and using indexes that work based on these algorithms.

In the case of this analysis, HNSW indexes were created, one for each of the distance metrics used.

create index if not exists idx_l2_document_embedding on document
    using hnsw (embedding vector_l2_ops)
    with (m = 16, ef_construction = 64);

create index if not exists idx_ip_document_embedding on document
    using hnsw (embedding vector_ip_ops);

create index if not exists idx_cosine_document_embedding on document
    using hnsw (embedding vector_cosine_ops);

Each of them may be parameterized with the maximum number of connections per layer and the size of the dynamic list of candidates when constructing the graph, respectively.

Take-aways

Vector databases play an important role in the AI context, as they are used to integrate self-data with the actual AI model and consequently transforming it into a less stateless one.

For thorough and reliable results, there are a few important factors to take into account when choosing a metric. The actual data, the model used and the application type should be primarily taken into account. Then, the meaning of the metric is important in the concrete context.

Concerning the metrics analyzed in this article, from cosine similarity point of view, two vectors are considered related if the angle between them is small, irrespective of their magnitude. On the other hand, the L2 distance between them might be substantial and discussions around the normalization of the data, loss functions and fine tuning might arise additionally in this case.

All in all, it is advisable to use the same (distance) metric as the one the ML model (the vectorizer, the entity that produces the embeddings) uses.

Resources

  1. pgVector
  2. Spring AI Reference
  3. Open AI Platform Docs
  4. The formulae were created using Mathcha
  5. The picture was taken in Cluj, Romania

Kafka Message Filtering – An Analysis

by Horatiu Dan

A lot of companies nowadays use event driven architectures in their day to day business activities, especially when they desire their applications to own real-time or near real-time reactiveness.

In such a scenery, during the interactions among the three main type of actors – producers, message broker and consumers – a lot of messages are exchanged. Nevertheless, under certain circumstances, some of these messages might not be of interest and thus they are discarded and ignored.

This article aims to analyze in detail how a consumer application shall be configured so that it behaves correctly when it needs to filter messages that are “irrelevant”. First, a standard record filter strategy is configured at consumer level. Then, a custom deserialization mechanism is added and the analysis is refined. As stated, the intention is to preserve a correct behavior of the consumer.

Set-up

  • Java 21
  • Maven 3.9.2
  • Spring Boot – version 3.2.2
  • Redpanda message broker running in Docker – image version 23.2.15

As message broker, the great and lightweight Redpanda is chosen. Since it is completely Kafka compatible, the development and the configuration do not need to be modified at all if deciding to change it with a different one. [Resource 1] describes how to accomplish the Redpanda minimal set-up.

Once the Docker container is up and running, a topic called request is created with the following command:

>docker exec -it redpanda-0 rpk topic create request
TOPIC    STATUS
request  OK
>docker exec -it redpanda-0 rpk cluster info
CLUSTER
=======
redpanda.581f9a24-3402-4a17-af28-63353a602421

BROKERS
=======
ID    HOST        PORT
0*    redpanda-0  9092

TOPICS
======
NAME                PARTITIONS  REPLICAS
__consumer_offsets  3           1
_schemas            1           1
request             1           1

As shown, the request topic was created successfully.

Implement a Record Filter Strategy

The use case is the following:

  • the producer sends a request to the configured topic
  • if the request message fulfills the acceptance criteria, the consumer processes it
  • otherwise, the message is discarded

A request message has a simple form:

{
	"id": "34b25c6b-60d6-4e53-8f79-bdcdd17b3a2d",
	"contextId": "hcd"
}

having just two fields, an identifier and a context identifier.

Messages are taken into account only in a certain acceptable context. Differently put, a message is accepted if it has a certain contextId, that is equal to the one configured on the consumer side, otherwise it is discarded.

A request is modelled by the following record:

public record Request(String id, String contextId) {
}

For configuring a producer and a consumer, at least these properties are needed (application.properties file):

# the path to the message broker
broker.url = localhost:19092

# the name of the topic
topic.request = request

# the unique string that identifies the consumer group of the consumer
context.id = hcd

The requirement is clear – only the messages having hcd as contextId are accepted.

In order to send messages, a producer needs a KafkaTemplate instance, configured as below:

@Configuration
public class KafkaConfig {

    @Bean
    public KafkaTemplate<String, String> kafkaTemplate() {
        Map<String, Object> props = new HashMap<>();
        props.put(ProducerConfig.BOOTSTRAP_SERVERS_CONFIG, brokerUrl);
        props.put(ProducerConfig.KEY_SERIALIZER_CLASS_CONFIG, StringSerializer.class);
        props.put(ProducerConfig.VALUE_SERIALIZER_CLASS_CONFIG, StringSerializer.class);

        ProducerFactory<String, String> producerFactory = new DefaultKafkaProducerFactory<>(props);

        return new KafkaTemplate<>(producerFactory);
    }
}

One may observe in the producer configuration that a StringSerializer was chosen for marshalling the payload value. Usually, a JsonSerializer provides more robustness to the producer-consumer contract. Nevertheless, the choice here was intentional to increase the experimental flexibility.

Once the messages reach the request topic, a consumer is configured to pick them up.

@Configuration
@EnableKafka
public class KafkaConfig {

    @Value("${broker.url}")
    private String brokerUrl;

    @Value("${context.id}")
    private String groupId;

    @Bean
    public ConcurrentKafkaListenerContainerFactory<String, Request> kafkaListenerContainerFactory(CustomRecordFilterStrategy recordFilterStrategy) {
        Map<String, Object> props = new HashMap<>();
        props.put(ConsumerConfig.BOOTSTRAP_SERVERS_CONFIG, brokerUrl);
        props.put(ConsumerConfig.KEY_DESERIALIZER_CLASS_CONFIG, StringDeserializer.class);
        props.put(ConsumerConfig.VALUE_DESERIALIZER_CLASS_CONFIG, JsonDeserializer.class);
        props.put(ConsumerConfig.GROUP_ID_CONFIG, groupId);
        props.put(JsonDeserializer.TRUSTED_PACKAGES, Request.class.getPackageName());
        props.put(JsonDeserializer.VALUE_DEFAULT_TYPE, Request.class.getName());

        DefaultKafkaConsumerFactory<String, Request> defaultFactory = new DefaultKafkaConsumerFactory<>(props,
                new StringDeserializer(), new JsonDeserializer<>(Request.class));

        ConcurrentKafkaListenerContainerFactory<String, Request> factory = new ConcurrentKafkaListenerContainerFactory<>();
        factory.setConsumerFactory(defaultFactory);
        factory.setRecordFilterStrategy(recordFilterStrategy);
        factory.setCommonErrorHandler(new DefaultErrorHandler());
        return factory;
    }
}

Line 26 in the listing above allows injecting a record filtering strategy, which is exactly the purpose here – a mean to decide whether a message is filtered out or not.

The RecordFilterStrategy interface has one abstract method

boolean filter(ConsumerRecord consumerRecord);

which according to its JavaDoc, returns true if the ConsumerRecord should be discarded (K represents the message key, while V the message value).

In the case of this proof of concept, all messages that have their contextId equal to hcd are accepted and consumed, while the rest are filtered out. The implementation is below.

@Component
public class CustomRecordFilterStrategy implements RecordFilterStrategy<String, Request> {

    private static final Logger LOG = LoggerFactory.getLogger(CustomRecordFilterStrategy.class);

    @Value("${context.id}")
    private String contextId;

    @Override
    public boolean filter(ConsumerRecord<String, Request> consumerRecord) {
        Request request = consumerRecord.value();

        boolean discard = !contextId.equals(request.contextId());
        LOG.info("{} is{} compliant.", request, discard ? "n't" : "");
        return discard;
    }
}

As part of the configuration, the KafkaListenerContainerFactory interface is responsible for creating the listener container of a particular endpoint. The @EnableKafka annotation on the configuration class enables the detection of @KafkaListener annotations on any Spring-managed beans in the container. Thus, the actual listener (the message consumer) is developed next.

@Component
public class RequestMessageListener {

    private static final Logger LOG = LoggerFactory.getLogger(RequestMessageListener.class);

    private final ResponseService responseService;

    public RequestMessageListener(ResponseService responseService) {
        this.responseService = responseService;
    }

    @KafkaListener(topics = "${topic.request}", groupId = "${context.id}")
    public void onMessage(@Payload Request request) {
        LOG.info("Processing {}.", request);

        responseService.send(Response.success());
    }
}

Its functionality is trivial, it logs the messages read from the request topic and destined to the configured consumer group. Then, it invokes a ResponseService which acts as the entity that sends a message back (here, it only logs it).

@Service
public class ResponseService {

    private static final Logger LOG = LoggerFactory.getLogger(ResponseService.class);

    public void send(Response response) {
        LOG.info("Sending {}.", response);
    }
}

A Reponse is modeled simply, as below:

public record Response (String id,
                        Result result) {

    public static Response success() {
        return new Response(UUID.randomUUID().toString(), Result.SUCCESS);
    }
    
    public enum Result {
        SUCCESS, FAILURE
    }
}

When the the application is started, provided the message broker is up, the listener is ready to receive messages.

INFO 20080 --- [main] c.h.r.RecordFilterStrategyApplication				  : Started RecordFilterStrategyApplication in 1.282 seconds (process running for 1.868)
INFO 20080 --- [main] fkaConsumerFactory$ExtendedKafkaConsumer            : [Consumer clientId=consumer-hcd-1, groupId=hcd] Subscribed to topic(s): request
INFO 20080 --- [ntainer#0-0-C-1] org.apache.kafka.clients.Metadata        : [Consumer clientId=consumer-hcd-1, groupId=hcd] Cluster ID: redpanda.581f9a24-3402-4a17-af28-63353a602421
INFO 20080 --- [ntainer#0-0-C-1] o.a.k.c.c.internals.ConsumerCoordinator  : [Consumer clientId=consumer-hcd-1, groupId=hcd] Request joining group due to: need to re-join with the given member-id: consumer-hcd-1-1fa7cd25-2bf2-49bd-82fd-ac3e4c54cafc
INFO 20080 --- [ntainer#0-0-C-1] o.a.k.c.c.internals.ConsumerCoordinator  : [Consumer clientId=consumer-hcd-1, groupId=hcd] Successfully joined group with generation Generation{generationId=7, memberId='consumer-hcd-1-1fa7cd25-2bf2-49bd-82fd-ac3e4c54cafc', protocol='range'}

In order to check the integration, the following two tests are used. Since a Request is expected by the listener, a compliance template was created for convenience.

@SpringBootTest
class RecordFilterStrategyApplicationTests {

    @Autowired
    private KafkaTemplate<String, String> kafkaTemplate;

    @Value("${topic.request}")
    private String topic;

    @Value("${context.id}")
    private String contextId;

    private static final String template = """
        {
            "id": "%s",
            "contextId": "%s"
        }""";

    @Test
    void compliant() {
        kafkaTemplate.send(topic,
                String.format(template, UUID.randomUUID(), contextId));
    }

    @Test
    void notCompliant() {
        kafkaTemplate.send(topic,
                String.format(template, UUID.randomUUID(), "other context"));
    }
}

compliant() sends a message whose contextId is as this consumer has configured it. As expected, it is processed and a response is sent back.

INFO 20080 --- [ntainer#0-0-C-1] c.h.r.l.CustomRecordFilterStrategy    : Request[id=44a2644c-0025-4a38-bd36-f163a530725e, contextId=hcd] is compliant.
INFO 20080 --- [ntainer#0-0-C-1] c.h.r.listener.RequestMessageListener : Processing Request[id=44a2644c-0025-4a38-bd36-f163a530725e, contextId=hcd].
INFO 20080 --- [ntainer#0-0-C-1] c.h.r.listener.ResponseService        : Sending Response[id=ebe0f65c-eddf-4866-b71f-e6cd766dd499, result=SUCCESS].

notCompliant() sends a message whose contextId is different from what was configured on this consumer. Thus, the message is neither processed, nor responded to, but ignored.

INFO 20080 --- [ntainer#0-0-C-1] c.h.r.l.CustomRecordFilterStrategy : Request[id=ed22f60c-b13d-4315-8132-46aa83ddf33b, contextId=other context] isn't compliant.

So far, the proof of concept has exemplified how to configure the consumer with a record filtering strategy so that only certain messages are accepted.

The code for this part is here – 1-filter-strategy

Implement a Record Filter Strategy with Custom Deserialization

Let’s assume that the messages which are consumed from the request queue are unmarshalled using a custom deserializer and the filtering is still required.

The custom deserializer here is trivial and has a didactic purpose. Moreover, in case the id field is missing, a runtime RequestDeserializationException is thrown. Such an action is not necessarily needed at this point, but it was put here to outline a certain use case. Read on.

public class CustomRequestDeserializer extends StdDeserializer<Request> {

    private static final Logger LOG = LoggerFactory.getLogger(CustomRequestDeserializer.class);

    public CustomRequestDeserializer() {
        super(Request.class);
    }

    @Override
    public Request deserialize(JsonParser jsonParser, DeserializationContext deserializationContext) throws IOException {
        ObjectCodec oc = jsonParser.getCodec();
        JsonNode root = oc.readTree(jsonParser);

        final String contextId = deserializeField(root, "contextId");

        final String id = deserializeField(root, "id");
        if (id == null || id.isEmpty()) {
            throw new RequestDeserializationException("'id' is required");
        }

        Request request = new Request(id, contextId);
        LOG.info("Successfully deserialized {}", request);
        return request;
    }
}

To apply it, the Request record is annotated as below:

@JsonDeserialize(using = CustomRequestDeserializer.class)
public record Request(String id, String contextId) {
}

Up until now, the behavior described in the first part is preserved. If the previous compliant() and nonCompliant() tests are run again, the outcome is the same.

The next analyzed situation is the one in which a RequestDeserializationException is thrown when deserializing an incoming message. Let’s assume the id is empty, thus the form is as below:

{
	"id": "",
	"contextId": "hcd"
}
@Test
void deserializationError_compliant() {
	kafkaTemplate.send(topic,
			String.format(template, "", contextId));
}

When such a message is received, the outcome is the following:

...
Caused by: com.hcd.recordfilterstrategy.domain.deserialization.RequestDeserializationException: 'id' is required
...

An exception thrown at desrialization time determines the message to be neither consumed, nor responded to, but to be lost.

See [Resource 3] for a detailed analysis on situations like this.

One solution that allows recovering after deserialization exceptions is to configure the value deserializer of the KafkaListenerContainerFactory with a failed deserialization function – see line 15 below:

@Bean
public ConcurrentKafkaListenerContainerFactory<String, Request> kafkaListenerContainerFactory(CustomRecordFilterStrategy recordFilterStrategy,
																							  FailedRequestDeserializationFunction failedDeserializationFunction) {
	Map<String, Object> props = new HashMap<>();
	props.put(ConsumerConfig.BOOTSTRAP_SERVERS_CONFIG, brokerUrl);
	props.put(ConsumerConfig.KEY_DESERIALIZER_CLASS_CONFIG, StringDeserializer.class);
	props.put(ConsumerConfig.VALUE_DESERIALIZER_CLASS_CONFIG, JsonDeserializer.class);
	props.put(ConsumerConfig.GROUP_ID_CONFIG, groupId);
	props.put(JsonDeserializer.TRUSTED_PACKAGES, Request.class.getPackageName());
	props.put(JsonDeserializer.VALUE_DEFAULT_TYPE, Request.class.getName());

	JsonDeserializer<Request> jsonDeserializer = new JsonDeserializer<>(Request.class);

	ErrorHandlingDeserializer<Request> valueDeserializer = new ErrorHandlingDeserializer<>(jsonDeserializer);
	valueDeserializer.setFailedDeserializationFunction(failedDeserializationFunction);

	DefaultKafkaConsumerFactory<String, Request> defaultFactory = new DefaultKafkaConsumerFactory<>(props,
			new StringDeserializer(), valueDeserializer);

	ConcurrentKafkaListenerContainerFactory<String, Request> factory = new ConcurrentKafkaListenerContainerFactory<>();
	factory.setConsumerFactory(defaultFactory);
	factory.setRecordFilterStrategy(recordFilterStrategy);
	factory.setCommonErrorHandler(new DefaultErrorHandler());
	return factory;
}

The purpose of the component is to allow recovering after such an exceptional situation and to be able to send a failure response back.

@Component
public class FailedRequestDeserializationFunction implements Function<FailedDeserializationInfo, Request> {

    private static final Logger LOG = LoggerFactory.getLogger(FailedRequestDeserializationFunction.class);

    private final ResponseService responseService;

    public FailedRequestDeserializationFunction(ResponseService responseService) {
        this.responseService = responseService;
    }

    @Override
    public Request apply(FailedDeserializationInfo failedDeserializationInfo) {
        final Exception ex = failedDeserializationInfo.getException();

        if (ex instanceof RequestDeserializationException deserializationEx) {
            LOG.info("Error deserializing request - {}", deserializationEx.getMessage());

            responseService.send(Response.failure());

        } else {
            LOG.error("Unexpected error deserializing request.", ex);
        }

        return null;
    }
}

If the same test is run again and a compliant, but incorrect message is sent, the behavior changes.

2024-03-13T10:52:38.893+02:00  INFO 24232 --- [ntainer#0-0-C-1] d.d.FailedRequestDeserializationFunction : Error deserializing request - 'id' is required
2024-03-13T10:52:38.895+02:00  INFO 24232 --- [ntainer#0-0-C-1] c.h.r.listener.ResponseService           : Sending Response[id=5393b4a0-3849-4130-934b-671e43a2358f, result=FAILURE].

The only left case is that of a non-compliant and incorrect message, meaning the id is still empty, but the contextId is different from the expected one.

{
	"id": "",
	"contextId": "other context"
}

If the following test is run, nothing changes, unfortunately the failed deserialization function still sends a failure response back, although the record filtering strategy should have filtered the message out as the contextId is non-compliant.

@Test
void deserializationError_notCompliant() {
	kafkaTemplate.send(topic,
			String.format(template, "", "other context"));
}
2024-03-13T11:03:56.609+02:00  INFO 24232 --- [ntainer#0-0-C-1] d.d.FailedRequestDeserializationFunction : Error deserializing request - 'id' is required
2024-03-13T11:03:56.610+02:00  INFO 24232 --- [ntainer#0-0-C-1] c.h.r.listener.ResponseService           : Sending Response[id=b345f001-3543-46da-bc0f-17c63c20e32a, result=FAILURE].

The code for this second section is here – 2-filter-strategy-custom-deser.

Implement a Record Filter Strategy with Custom Deserialization – Correctly

The last part of this analysis provides a solution on how to address this last use-case.

Before moving on with it, let’s recall what currently happens in all possible use-cases:

Correct, compliant message

  1. since the message is correct, the custom deserializer successfully unmarshalls it
  2. the failed deserialization function is not invoked
  3. since the message is compliant, the record filter strategy does not reject it
  4. the listener is invoked, it processes the request and sends a response back

Correct, non-compliant message

  1. since the message is correct, the custom deserializer successfully unmarshalls it
  2. the failed deserialization function is not invoked
  3. since the message is non-compliant, the record filter strategy rejects it
  4. the listener is not invoked

Incorrect, compliant or non-compliant message

  1. since the message is incorrect, the custom deserializer throws an exception
  2. the failed deserialization is invoked and it sends a failure response back
  3. the record filter strategy is not invoked
  4. the listener is not invoked

In case of a correct message, the consumer application behaves correctly, irrespective of the compliancy of the message.
In case of an incorrect message, a failure response is sent back, irrespective of the compliancy of the message, which means the consumer behaves correctly only for compliant messages.

For incorrect, non-compliant messages it should act as follows:

  1. since the message is incorrect, the custom deserializer throws an exception
  2. the failed deserialization is invoked and it sends a failure response back only if the message is compliant
  3. the record filter strategy is not invoked
  4. the listener is not invoked

At a first glance, in order to cover the last use-case as well, only the FailedRequestDeserializationFunction needs to be enhanced to also check the message compliancy.

Basically, before sending the response, the same check as the one in CustomRecordFilterStrategy shall be added. To avoid repetition, some refactoring is done.

To isolate the compliancy check, a separate component in charge of it is created.

@Component
public class RequestFilterStrategy {

    private static final Logger LOG = LoggerFactory.getLogger(RequestFilterStrategy.class);

    @Value("${context.id}")
    private String contextId;

    public boolean filter(String contextId) {
        boolean discard = !this.contextId.equals(contextId);
        LOG.info("Request is{} compliant.", discard ? "n't" : "");
        return discard;
    }
}

Then, the component is injected both in the CustomRecordFilterStrategy and in the FailedRequestDeserializationFunction and consequently, they are refactored as follows.

@Component
public class CustomRecordFilterStrategy implements RecordFilterStrategy<String, Request> {

    private final RequestFilterStrategy requestFilterStrategy;

    public CustomRecordFilterStrategy(RequestFilterStrategy requestFilterStrategy) {
        this.requestFilterStrategy = requestFilterStrategy;
    }

    @Override
    public boolean filter(ConsumerRecord<String, Request> consumerRecord) {
        return requestFilterStrategy.filter(consumerRecord.value().contextId());
    }
}
@Component
public class FailedRequestDeserializationFunction implements Function<FailedDeserializationInfo, Request> {

    private static final Logger LOG = LoggerFactory.getLogger(FailedRequestDeserializationFunction.class);

    private final RequestFilterStrategy requestFilterStrategy;
    private final ResponseService responseService;

    public FailedRequestDeserializationFunction(RequestFilterStrategy requestFilterStrategy,
                                                ResponseService responseService) {
        this.requestFilterStrategy = requestFilterStrategy;
        this.responseService = responseService;
    }

    @Override
    public Request apply(FailedDeserializationInfo failedDeserializationInfo) {
        final Exception ex = failedDeserializationInfo.getException();

        if (ex instanceof RequestDeserializationException deserializationEx) {
            LOG.info("Error deserializing request - {}", deserializationEx.getMessage());

            if (!requestFilterStrategy.filter(deserializationEx.getContextId())) {
                responseService.send(Response.failure());
            }
        } else {
            LOG.error("Unexpected error deserializing request.", ex);
        }

        return null;
    }
}

To check the behavior, the last unit test is run again.

@Test
void deserializationError_notCompliant() {
	kafkaTemplate.send(topic,
			String.format(template, "", "other context"));
}

The output clearly shows that for incorrect, non-compliant messages, no response is sent anymore.

2024-03-13T15:05:56.432+02:00  INFO 17916 --- [ntainer#0-0-C-1] d.d.FailedRequestDeserializationFunction : Error deserializing request - 'id' is required
2024-03-13T15:05:56.432+02:00  INFO 17916 --- [ntainer#0-0-C-1] c.h.r.listener.RequestFilterStrategy     : Request isn't compliant.

The code for the enhanced solution is here – 3-filter-strategy-custom-deser-covered

Resources

  1. Redpanda Quickstart
  2. Spring for Apache Kafka Reference
  3. Acting Soon on Kafka Deserialization Errors
  4. The picture was taken at Legoland, Germany

Generative AI with Spring Boot and Spring AI

by Horatiu Dan

Context

It’s been more than 20 years since Spring Framework appeared in the software development landscape and 10 since Spring Boot version 1.0 was released. By now nobody should have any doubt that Spring has created a unique style through which developers are freed from repetitive tasks and left to focus on the business value delivery. As years passed, Spring’s technical depth has continually increased, covering a wide variety of development areas and technologies. On the other hand, its technical breadth has been continually expanded as more focused solutions have been experimented, proof of concepts created and ultimately promoted under the projects’ umbrella (towards the technical depth).

One such example is the new Spring AI project which, according to its reference documentation, aims to ease the development when a generative artificial intelligence layer is aimed to be incorporated into applications. Once again, developers are freed from repetitive tasks and offered with simple interfaces for a direct interaction with the pre-trained models that incorporate the actual processing algorithms.

By interacting with generative pre-trained transformers (GPTs) directly or via Spring AI programmatically, users (developers) do not need to (although it would be useful) posses extensive machine learning knowledge. As an engineer, I strongly believe that even if such (developer) tools can be rather easily and rapidly used to produce results, it is advisable to temper ourselves, to switch to a watchful mode and try to gain a decent understanding of the base concepts first. Moreover, by following this path, the outcome might be even more useful.

Purpose

This article shows how Spring AI can be integrated into a Spring Boot application and fulfill a programmatic interaction with Open AI. It is assumed that prompt design in general (prompt engineering) is a state-of-the-art activity. Consequently, the prompts used during experimentation are quite didactic, without much applicability. The focus here is on the communication interface, that is, Spring AI API.

Before the Implementation

First and foremost, one shall clarify the self rationale for incorporating and utilizing a GPT solution, in addition to the desire to deliver with greater quality, in less time and with lower costs.

Generative AI is said to be good at doing a great deal of time-consuming tasks, quicker, more efficiently and output the results. Moreover, if these results are further validated by experienced and wise humans, the chances to obtain something useful increase. Fortunately, people are still part of the scenery.

Next, one shall resist the temptation to jump right into the implementation and at least dedicate some time to get a bit familiar with the general concepts. An in-depth exploration of generative AI concepts is way beyond the scope of this article. Nevertheless, the “main actors” that appear in the interaction are briefly outlined below.

The Stage – Generative AI is part of Machine Learning that is part of Artificial Intelligence

Input – the provided data (incoming)

Output – the computed results (outgoing)

Large Language Model (LLM) – the fine-tuned algorithm that based on the interpreted input, produces the output

Prompt – a the state-of-the-art interface through which the input is passed to the model

Prompt Template – a component that allows constructing structured parameterized prompts

Tokens – the components the algorithm internally translates the input into, then uses to compile the results and ultimately constructs the output from.

Model’s Context Window – the threshold the model limits the number of tokens count per call (usually, the more tokens are used, the more expensive the operation is)

Finally, an implementation may be started, but as it progresses, it is advisable to revisit and refine the first two steps.

Prompts

In this exercise, we ask for the following:

Write {count = three} reasons why people in {location = Romania} should consider a {job = software architect} job. 
These reasons need to be short, so they fit on a poster. 
For instance, "{job} jobs are rewarding."

This basically represents the prompt. As advised, a clear topic, a clear meaning of the task and additional helpful pieces of information should be provided as part of the prompts, in order to increase the results’ accuracy.

The prompt contains three parameters, which allow coverage for a wide range of jobs in various locations.

  • count – the number of reasons aimed as part of the output
  • job – the domain, the job interested in
  • location – the country, town, region, etc. the job applicants reside

Proof of Concept

In this post, the simple proof of concept aims the following:

  1. integrate Spring AI in a Spring Boot application and use it
  2. allow a client to communicate with Open AI via the application
    • client issues a parametrized HTTP request to the application
    • the application uses a prompt to create the input, sends it to Open AI retrieves the output
    • the application sends the response to the client

Set-up

  • Java 21
  • Maven 3.9.2
  • Spring Boot – v. 3.2.2
  • Spring AI – v. 0.8.0-SNAPSHOT (still developed, experimental)

Implementation

Spring AI Integration

Normally, this is a basic step not necessarily worth mentioning. Nevertheless, since Spring AI is currently released as a snapshot, in order to be able to integrate the Open AI auto-configuration dependency, one shall add a reference to Spring Milestone / Snapshot repositories.

<repositories>
	<repository>
		<id>spring-milestones</id>
		<name>Spring Milestones</name>
		<url>https://repo.spring.io/milestone</url>
		<snapshots>
			<enabled>false</enabled>
		</snapshots>
	</repository>
	<repository>
		<id>spring-snapshots</id>
		<name>Spring Snapshots</name>
		<url>https://repo.spring.io/snapshot</url>
		<releases>
			<enabled>false</enabled>
		</releases>
	</repository>
</repositories>

The next step is to add the spring-ai-openai-spring-boot-starter Maven dependency.

<dependency>
	<groupId>org.springframework.ai</groupId>
	<artifactId>spring-ai-openai-spring-boot-starter</artifactId>
	<version>0.8.0-SNAPSHOT</version>
</dependency>

Open AI ChatClient is now part of the application classpath. It is the component used to send the input to Open AI and retrieve the output back.

In order to be able to connect to the AI Model, the spring.ai.openai.api-key property needs to be set-up in the application.properties file.

spring.ai.openai.api-key = api-key-value

Its value represents a valid API Key of the user on behalf which the communication is made. By accessing [Resource 2] one can either sign-up or sign-in and generate one.

Client – Spring Boot Application Communication

The first part of the proof of concept is the communication between a client application (e.g. browser, curl etc.) and the application developed. This is done via a REST controller, accessible via a HTTP GET request.

The URL is /job-reasons together with the three parameters previously outlined when the prompt was defined, which conducts to the following form:

/job-reasons?count={count}&job={job}&location={location}

and the corresponding controller:

@RestController
public class OpenAiController {

	@GetMapping("/job-reasons")
    public ResponseEntity<String> jobReasons(@RequestParam(value = "count", required = false, defaultValue = "3") int count,
                                             @RequestParam("job") String job,
                                             @RequestParam("location") String location) {
        return ResponseEntity.ok().build();
    }
}

Since the response from Open AI is going to be a String, the controller returns a ResponseEntity that encapsulates a String. If we run the application and issue a request, currently nothing is returned as part of the response body.

Client – Open AI Communication

Spring AI currently focuses on AI Models that process language and produce language or numbers. Examples of Open AI models in the former category are GPT4-openai or GPT3.5-openai.

For fulfilling an interaction with these AI Models, which actually designate Open AI algorithms, Spring AI provides a uniform interface.

ChatClient interface currently supports text input and output and has a simple contract.

@FunctionalInterface
public interface ChatClient extends ModelClient<Prompt, ChatResponse> {
	default String call(String message) {
		Prompt prompt = new Prompt(new UserMessage(message));
		return call(prompt).getResult().getOutput().getContent();
	}

	ChatResponse call(Prompt prompt);
}

The actual method of the functional interface is the one usually used.

In the case of our proof of concept, this is exactly what it is needed, a way of calling Open AI and sending the aimed parametrized Prompt as parameter. The following OpenAiService is defined, where an instance of ChatClient is injected.

@Service
public class OpenAiService {

    private final ChatClient client;

    public OpenAiService(OpenAiChatClient aiClient) {
        this.client = aiClient;
    }
	
	public String jobReasons(int count, String domain, String location) {
        final String promptText = """
                Write {count} reasons why people in {location} should consider a {job} job.
                These reasons need to be short, so they fit on a poster.
                For instance, "{job} jobs are rewarding."
                """;

        final PromptTemplate promptTemplate = new PromptTemplate(promptText);
        promptTemplate.add("count", count);
        promptTemplate.add("job", domain);
        promptTemplate.add("location", location);

        ChatResponse response = client.call(promptTemplate.create());
        return response.getResult().getOutput().getContent();
    }
}

With the application running, if the following request is performed, from the browser:

http://localhost:8080/gen-ai/job-reasons?count=3&job=software%20architect&location=Romania

the below result is retrieved:

  1. Lucrative career: Software architect jobs offer competitive salaries and excellent growth opportunities, ensuring financial stability and success in Romania.
  2. In-demand profession: As the demand for technology continues to grow, software architects are highly sought after in Romania and worldwide, providing abundant job prospects and job security.
  3. Creative problem-solving: Software architects play a crucial role in designing and developing innovative software solutions, allowing them to unleash their creativity and make a significant impact on various industries.

which is exactly what it was intended – an easy interface through which the Open AI GPT model can be asked to write a couple of reasons about why a certain job in a certain location is appealing.

Adjustments and Observations

The simple proof of concept developed so far mainly uses the default configurations available.

The ChatClient instance may be configured according to the desired needs via various properties. As this is beyond the scope of this writing, only two are exemplified here.

spring.ai.openai.chat.options.model designates the AI Model to use. By default, it is ‘gpt-35-turbo’, but ‘gpt-4’ and ‘gpt-4-32k’ designate the latest versions. Although available, one may not be able to access these using a pay-as-you-go plan, but there are additional pieces of information available on the Open AI website for accommodating it.

Another property worth mentioning is spring.ai.openai.chat.options.temperature. According to the reference documentation, the sampling temperature controls the “creativity of the responses”. It is said that higher values make the output “more random”, while lower ones “more focused and deterministic”. The default value is 0.8, if we decrease it to 0.3, restart the application and ask again with the same request parameters, the below result is retrieved.

  1. Lucrative career opportunities: Software architect jobs in Romania offer competitive salaries and excellent growth prospects, making it an attractive career choice for individuals seeking financial stability and professional advancement.
  2. Challenging and intellectually stimulating work: As a software architect, you will be responsible for designing and implementing complex software systems, solving intricate technical problems, and collaborating with talented teams. This role offers continuous learning opportunities and the chance to work on cutting-edge technologies.
  3. High demand and job security: With the increasing reliance on technology and digital transformation across industries, the demand for skilled software architects is on the rise. Choosing a software architect job in Romania ensures job security and a wide range of employment options, both locally and internationally.

It is visible that the output is way more descriptive in this case.

One last consideration is related to the structure of the output obtained. It would be convenient to have the ability to map the actual payload received to a Java object (class or record, for instance). As of now, the representation is textual and so was the implementation. Output parsers may achieve this, similarly to Spring JDBC’s mapping structures.

In this proof of concept, a BeanOutputParser is used, which allows deserializing the result directly in a Java record as below:

public record JobReasons(String job,
                         String location,
                         List<String> reasons) {
}

by taking the {format} as part of the prompt text and providing it as an instruction to the AI Model.

The OpenAiService method becomes:

public JobReasons formattedJobReasons(int count, String job, String location) {
	final String promptText = """
			Write {count} reasons why people in {location} should consider a {job} job.
			These reasons need to be short, so they fit on a poster.
			For instance, "{job} jobs are rewarding."
			{format}
			""";

	BeanOutputParser<JobReasons> outputParser = new BeanOutputParser<>(JobReasons.class);

	final PromptTemplate promptTemplate = new PromptTemplate(promptText);
	promptTemplate.add("count", count);
	promptTemplate.add("job", job);
	promptTemplate.add("location", location);

	promptTemplate.add("format", outputParser.getFormat());
	promptTemplate.setOutputParser(outputParser);

	final Prompt prompt = promptTemplate.create();

	ChatResponse response = client.call(prompt);
	return outputParser.parse(response.getResult().getOutput().getContent());
}

When invoking again, the output is as below:

{
	"job":"software architect",
	"location":"Romania",
	"reasons":[
		"High demand",
		"Competitive salary",
		"Opportunities for growth"
	]
}

The format is the expected one, but the reasons appear less explanatory, which means additional adjustments are required in order to achieve better usability. From a proof of concept point of view though, this is acceptable, as the focus was on the form.

Conclusions

Prompt design is an important part of the task – the better articulated prompts are, the better the input and the higher the output quality is.

Using Spring AI to integrate with various chat models is quite straightforward – this post showed-cased an Open AI integration.

Nevertheless, in the case of Gen AI in general, just as in the case of almost any technology, it is very important to get familiar at least with the general concepts first. Then, to try to understand the magic behind the way the communication is carried out and only afterwards to start writing “production” code.

Last but not least, it is advisable to further explore the Spring AI API to understand the implementations and remain up-to-date as it evolves and improves.

The code is available here.

References

[1] – Spring AI Reference

[2] – Open AI Platform

[3] – The picture is from San Siro Stadium, taken (NOT AI generated) on the summer of 2023, in Milan, Italy while Coldplay was performing.

PostgreSQL Views with Runtime Parameters

by Horatiu Dan

There aren’t few the situations when applications are requested to be agile and versatile enough so that they can run dynamic reports for which the input comes at runtime.

This post aims to present a way of achieving it by leveraging the temporary configuration parameters supported by PostgreSQL databases.

According to the PostgreSQL documentation, starting with version 7.3, it is possible to set a configuration parameter using the set_config(name, value, is_local) function. Later, the value of the previously set parameter may be read using the current_setting(name) function, converted if needed and used. If the third parameter of the former function is true, the changed setting will only apply to the current transaction.

This is exactly what is needed here, a way of providing a runtime parameter value that can be used as part of an atomic operation.

Set-Up

The sample application is build with:

  • Java 21
  • Spring Boot version 3.1.15
  • PostgreSQL Driver version 42.6.0.
  • Liquibase 4.20.0
  • Maven 3.6.3

At application level, the Maven project is configured to use Spring Data JPA and Liquibase dependencies.

The domain is represented by products, whose prices are in various currencies. For converting between currencies, a currency exchange rate exists. The goal is to be able to read all products with their prices represented in a certain currency, at the rate of a certain day.

Proof of Concept

In order to start modelling, one shall first create a new schema, once connected to the database.

create schema pgsetting;

There are three entities – Product, Currency, CurrencyExchange.

@Entity
@Table(name = "product")
public class Product {

    @Id
    @Column(name = "id")
    private Long id;

    @Column(name = "name", nullable = false)
    private String name;

    @Column(name = "price", nullable = false)
    private Double price;

    @ManyToOne
    @JoinColumn(name = "currency_id")
    private Currency currency;
	
	...
}

@Entity
@Table(name = "currency")
public class Currency {

    @Id
    @Column(name = "id", nullable = false)
    private Long id;

    @Column(name = "name", nullable = false)
    private String name;

	...
}


@Entity
@Table(name = "currency_exchange")
public class CurrencyExchange {

    @Id
    @Column(name = "id", nullable = false)
    private Long id;

    @Column(name = "date", nullable = false)
    private LocalDate date;

    @ManyToOne
    @JoinColumn(name = "from_currency_id", nullable = false)
    private Currency from;

    @ManyToOne
    @JoinColumn(name = "to_currency_id", nullable = false)
    private Currency to;

    @Column(name = "value", nullable = false)
    private Double value;

	...
}

Each one has a corresponding CrudRepository.

@Repository
public interface ProductRepository extends CrudRepository<Product, Long> { }

@Repository
public interface CurrencyRepository extends CrudRepository<Currency, Long> { }

@Repository
public interface CurrencyExchangeRepository extends CrudRepository<CurrencyExchange, Long> { }

The data source is configured as usual in the application.properties file, together with the path to the Liquibase changelog file that records a few simple change sets for initializing the schema with the three tables and the relations among them.

For details, the application properties and db/changelog/schema-init.xml files may be explored.

The root changelog file is:

<?xml version="1.1" encoding="UTF-8" standalone="no"?>
<databaseChangeLog xmlns="http://www.liquibase.org/xml/ns/dbchangelog"
                   xmlns:xsi="http://www.w3.org/2001/XMLSchema-instance"
                   xsi:schemaLocation="http://www.liquibase.org/xml/ns/dbchangelog
                      https://www.liquibase.org/xml/ns/dbchangelog/dbchangelog-3.8.xsd">

    <include file="/db/changelog/schema-init.xml"/>
    
</databaseChangeLog>

When the application is started, the change sets are executed in the order they are declared. So far, everything is straight forward, nothing out of the ordinary – a simple Spring Boot application whose database changes are managed with Liquibase.

Creating the Dynamic Report

Let’s assume that currently the application has two currencies defined – RON and EUR and two products with their prices recorded in different currencies.

Currency

+--+----+
|id|name|
+--+----+
|1 |RON |
|2 |EUR |
+--+----+

Product

+--+-------------------+-----+-----------+
|id|name               |price|currency_id|
+--+-------------------+-----+-----------+
|1 |Swatch Moonlight v1|100  |2          |
|2 |Winter Sky         |1000 |1          |
+--+-------------------+-----+-----------+

CurrencyExchange rates for the 15th of November

+--+----------+----------------+--------------+-----+
|id|date      |from_currency_id|to_currency_id|value|
+--+----------+----------------+--------------+-----+
|1 |2023-11-15|2               |1             |5    |
|2 |2023-11-15|2               |2             |1    |
|3 |2023-11-15|1               |2             |0.2  |
|4 |2023-11-15|1               |1             |1    |
+--+----------+----------------+--------------+-----+

The aimed result is a product report with all prices in EUR, using the exchange rate from the 15th of November 2023. This means the price of the second product needs to be converted.

To ease the design, the previously set goal is divided into smaller parts, then conquered. Conceptually, products shall be fetched and their prices converted (if needed).

  1. Fetch the products
  2. Convert the prices in the requested currency, using the exchange rate of the requested day

The former is trivial, a Spring Data Repository method would easily allow getting the products – List<Product> findAll().

The latter is achievable through a query that makes the conversions.

SELECT p.id,
       p.name,
       p.price * e.value price,       
       e.to_currency_id currency_id,
       e.date
FROM product p
LEFT JOIN currency_exchange e on p.currency_id = e.from_currency_id and 
		e.to_currency_id = 2 and
		e.date = '2023-11-15'

In order to unite the two, the following are accomplished:

  • a view is defined, for the above query – product_view

It is defined in the product-view.sql file and added as an idempotent operation in a repeatable Liquibase change set that is run whenever changed.

<?xml version="1.1" encoding="UTF-8" standalone="no"?>
<databaseChangeLog xmlns="http://www.liquibase.org/xml/ns/dbchangelog"
                   xmlns:xsi="http://www.w3.org/2001/XMLSchema-instance"
                   xsi:schemaLocation="http://www.liquibase.org/xml/ns/dbchangelog
                      https://www.liquibase.org/xml/ns/dbchangelog/dbchangelog-3.8.xsd">

    <include file="/db/changelog/schema-init.xml"/>

    <changeSet id="repeatable" author="horatiucd" runOnChange="true">
        <sqlFile dbms="postgresql" path="db/changelog/product-view.sql"/>
    </changeSet>

</databaseChangeLog>
  • a new entity – ProductView – is defined as part of the domain, together with the corresponding repository
@Entity
@Immutable
public class ProductView {

    @Id
    private Long id;

    private String name;

    private Double price;

    private LocalDate date;

    @ManyToOne
    @JoinColumn(name = "currency_id")
    private Currency currency;
	
	...
}
@Repository
public interface ProductViewRepository extends org.springframework.data.repository.Repository<ProductView, Long> {

    List<ProductView> findAll();
}

The application is now able to construct the desired report, but only for a hardcoded currency and exchange rate.

In order to pass the two at runtime, the following are performed in the same transaction:

  • the two parameter values are set as configuration parameters – SELECT set_config(:name, :value, true)
  • the ProductView entities are fetched using the repository method

Also, the product_view is modified to read the configuration parameters set as part of the current transaction and select the data accordingly.

SELECT p.id,
       p.name,
       p.price * e.value price,
       e.date,
       e.to_currency_id currency_id
FROM product p
LEFT JOIN currency_exchange e on p.currency_id = e.from_currency_id and
		e.to_currency_id = current_setting('pgsetting.CurrencyId')::int and
		e.date = current_setting('pgsetting.CurrencyDate')::date;

current_setting('pgsetting.CurrencyId') and current_setting('pgsetting.CurrencyDate') calls read the previously set parameters, which are further converted and used.

The implementation needs some additional adjustments.

ProductViewRepository is enhanced with a method that allows setting the configuration parameters.

@Repository
public interface ProductViewRepository extends org.springframework.data.repository.Repository<ProductView, Long> {

    List<ProductView> findAll();

    @Query(value = "SELECT set_config(:name, :value, true)")
    void setConfigParam(String name, String value);
}

The last parameter is always set to true, thus the value is kept only during the current transaction.

Also, a ProductService is defined to clearly mark all operations involved in the transaction.

@Service
public class ProductService {

    private final ProductViewRepository productViewRepository;

    public ProductService(ProductViewRepository productViewRepository) {
        this.productViewRepository = productViewRepository;
    }

    @Transactional
    public List<ProductView> getProducts(Currency currency, LocalDate date) {
        productViewRepository.setConfigParam("pgsetting.CurrencyId",
                String.valueOf(currency.getId()));

        productViewRepository.setConfigParam("pgsetting.CurrencyDate",
                DateTimeFormatter.ofPattern("yyyy-MM-dd").format(date));

        return productViewRepository.findAll();
    }
}

The name of the parameters are the ones used in the product_view definition.

To certify the implementation, two tests are set-up.

@SpringBootTest
class Product1Test {

    @Autowired
    private CurrencyRepository currencyRepository;

    @Autowired
    private ProductRepository productRepository;

    @Autowired
    private CurrencyExchangeRepository rateRepository;

    @Autowired
    private ProductService productService;

    private Currency ron, eur;
    private Product watch, painting;
    private CurrencyExchange eurToRon, ronToEur;
    private LocalDate date;

    @BeforeEach
    public void setup() {
        ron = new Currency(1L, "RON");
        eur = new Currency(2L, "EUR");
        currencyRepository.saveAll(List.of(ron, eur));

        watch = new Product(1L, "Swatch Moonlight v1", 100.0d, eur);
        painting = new Product(2L, "Winter Sky", 1000.0d, ron);
        productRepository.saveAll(List.of(watch, painting));

        date = LocalDate.now();
        eurToRon = new CurrencyExchange(1L, date, eur, ron, 5.0d);
        CurrencyExchange eurToEur = new CurrencyExchange(2L, date, eur, eur, 1.0d);
        ronToEur = new CurrencyExchange(3L, date, ron, eur, .2d);
        CurrencyExchange ronToRon = new CurrencyExchange(4L, date, ron, ron, 1.0d);
        rateRepository.saveAll(List.of(eurToRon, eurToEur, ronToEur, ronToRon));
    }
}

The former fetches the products with prices in EUR, using the recorded exchange rates.

@Test
void prices_in_eur() {
	List<ProductView> products = productService.getProducts(eur, date);
	Assertions.assertEquals(2, products.size());

	Assertions.assertTrue(products.stream()
			.allMatch(product -> product.getCurrency().getId().equals(eur.getId())));

	Assertions.assertTrue(products.stream()
			.allMatch(product -> product.getDate().equals(date)));

	Assertions.assertEquals(watch.getPrice(),
			products.get(0).getPrice());
	Assertions.assertEquals(painting.getPrice() * ronToEur.getValue(),
			products.get(1).getPrice());
}

When called, product_view is:

+--+-------------------+-----+-----------+----------+
|id|name               |price|currency_id|date      |
+--+-------------------+-----+-----------+----------+
|1 |Swatch Moonlight v1|100  |2          |2023-11-15|
|2 |Winter Sky         |200  |2          |2023-11-15|
+--+-------------------+-----+-----------+----------+

The latter fetches the products with prices in RON, using the same exchange rates.

@Test
void prices_in_ron() {
	List<ProductView> products = productService.getProducts(ron, date);
	Assertions.assertEquals(2, products.size());

	Assertions.assertTrue(products.stream()
			.allMatch(product -> product.getCurrency().getId().equals(ron.getId())));

	Assertions.assertTrue(products.stream()
			.allMatch(product -> product.getDate().equals(date)));

	Assertions.assertEquals(watch.getPrice() * eurToRon.getValue(),
			products.get(0).getPrice());
	Assertions.assertEquals(painting.getPrice(),
			products.get(1).getPrice());
}

When called, product_view is:

+--+-------------------+-----+-----------+----------+
|id|name               |price|currency_id|date      |
+--+-------------------+-----+-----------+----------+
|1 |Swatch Moonlight v1|500  |1          |2023-11-15|
|2 |Winter Sky         |1000 |1          |2023-11-15|
+--+-------------------+-----+-----------+----------+

Sample Code

Available here.

Resources

  1. PostgreSQL System Admin Functions
  2. The picture was taken at Legoland, Germany

Acting Soon on Kafka Deserialization Errors

by Horatiu Dan

Context

Event driven architectures have been successfully used for quite an amount of time by a lot of organizations in various business cases. They excel at performance, scalability, evolvability and fault-tolerance providing a good level of abstraction and elasticity. These strengths made them good choices when applications needed real or near real-time reactiveness.

In terms of implementations, for standard messaging, ActiveMQ and RabbitMQ are good candidates, while for data streaming, platforms as Apache Kafka and Redpanda are more suitable. Usually, when developers and architects need to opt for either one of these two directions they analyze and weight from a bunch of angles – message payload, flow and usage of data, throughput, solution topology. As the discussion around these aspects can get too big and complex, it is not going to be refined as part of this article.

Conceptually, event driven architectures involve at least three main actors – message producers, message brokers and message consumers. Briefly, the purpose is to allow the producers and the consumers to communicate in a decoupled and asynchronous way, mean that is accomplished with the help of the previously mentioned message brokers. In the optimistic scenario, a producer creates a message, publishes it to a topic owned by the broker from which the consumer reads it, deals with it and out of courtesy provides a response back. Messages are serialized (marshalled) by the producers when sent to topics and de-serialized (unmarshalled) by consumers when received from topics.

This article focuses on the situation in which a consumer experiences issues when de-serializing a received message and provides a way of being able to act further. A few examples of such actions may include constructing a default message or sending back feedback to the message broker. Developers are creative enough to decide on this behavior, depending on the particular implemented use cases.

Set-up

  • Java 21
  • Maven 3.9.2
  • Spring Boot – version 3.1.5
  • Redpanda message broker running in Docker – image version 23.2.15

Redpanda is a lightweight message broker and it was chosen for this proof of concept to give the readers the opportunity to experiment a different option than the widely used Kafka one. As it is Kafka compatible, the development and the configuration of the producers and consumers will not need to change at all if moving from one service provider to another.

According to Redpanda documentation, the Docker support applies only to development and testing. For the purpose of this project, this is more than enough, thus a single Redpanda message broker is set-up to run in Docker.

See [Resource 1] for details on how to accomplish the minimal set-up.

Once up and running, a topic called minifig is created with the following command:

>docker exec -it redpanda-0 rpk topic create minifig
TOPIC    STATUS
minifig  OK

If the cluster is inspected, one may observe that a topic with one partition and one replica was created.

>docker exec -it redpanda-0 rpk cluster info
CLUSTER
=======
redpanda.581f9a24-3402-4a17-af28-63353a602421

BROKERS
=======
ID		HOST		PORT
0*		redpanda-0	9092

TOPICS
======
NAME				PARTITIONS	REPLICAS
__consumer_offsets	3			1
_schemas			1			1
minifig				1			1

Implementation

The flow is straight-forward, the producer sends a request to the configured topic which is further read by the consumer, as it is able to.

A request represents a mini-figure which is simplistically modelled by the following record:

public record Minifig(String id,
                      Size size,
                      String name) {

    public Minifig(Size size, String name) {
        this(UUID.randomUUID().toString(), size, name);
    }

    public enum Size {
        SMALL, MEDIUM, BIG;
    }
}

id is the unique identifier of the Minifig which has a certain name and is of a certain size – small, medium or big.

For configuring a producer and a consumer, at least these properties are needed (application.properties file):

# the path to the message broker
broker.url=localhost:19092

# the name of the broker topic
topic.minifig=minifig

# the unique string that identifies the consumer group of the consumer
topic.minifig.group.id=group-0

For sending messages, the producer needs a KafkaTemplate instance.

@Configuration
public class KafkaConfig {

    @Value("${broker.url}")
    private String brokerUrl;

    @Bean
    public KafkaTemplate<String, String> kafkaTemplate() {
        Map<String, Object> props = new HashMap<>();
        props.put(ProducerConfig.BOOTSTRAP_SERVERS_CONFIG, brokerUrl);
        props.put(ProducerConfig.KEY_SERIALIZER_CLASS_CONFIG, StringSerializer.class);
        props.put(ProducerConfig.VALUE_SERIALIZER_CLASS_CONFIG, StringSerializer.class);

        ProducerFactory<String, String> producerFactory = new DefaultKafkaProducerFactory<>(props);

        return new KafkaTemplate<>(producerFactory);
    }
}

One may observe in the producer configuration that a StringSerializer was chosen for marshalling the payload value. Usually, a JsonSerializer provides more robustness to the producer-consumer contract. Nevertheless, the choice here was intentional to increase the experimental flexibility on the consumer side (will see later). Just as a reminder, the interest in this proof of concept is to act on the encountered deserialization errors.

Once the messages reach the minifig topic, a consumer is configured to pick them up.

@Configuration
@EnableKafka
public class KafkaConfig {

    @Value("${broker.url}")
    private String brokerUrl;

    @Value("${topic.minifig.group.id}")
    private String groupId;

    @Bean
    public ConcurrentKafkaListenerContainerFactory<String, Minifig> kafkaListenerContainerFactory() {
        Map<String, Object> props = new HashMap<>();
        props.put(ConsumerConfig.BOOTSTRAP_SERVERS_CONFIG, brokerUrl);
        props.put(ConsumerConfig.KEY_DESERIALIZER_CLASS_CONFIG, StringDeserializer.class);
        props.put(ConsumerConfig.VALUE_DESERIALIZER_CLASS_CONFIG, JsonDeserializer.class);
        props.put(ConsumerConfig.GROUP_ID_CONFIG, groupId);
        props.put(JsonDeserializer.TRUSTED_PACKAGES, Minifig.class.getPackageName());
        props.put(JsonDeserializer.VALUE_DEFAULT_TYPE, Minifig.class.getName());

        DefaultKafkaConsumerFactory<String, Minifig> defaultFactory = new DefaultKafkaConsumerFactory<>(props);

        ConcurrentKafkaListenerContainerFactory<String, Minifig> factory = new ConcurrentKafkaListenerContainerFactory<>();
        factory.setConsumerFactory(defaultFactory);
		factory.setCommonErrorHandler(new DefaultErrorHandler());
        return factory;
    }
}

The KafkaListenerContainerFactory interface is responsible to create the listener container for a particular endpoint. The @EnableKafka annotation on the configuration class enables the detection of @KafkaListener annotations on any Spring-managed beans in the container. Thus, the actual listener (the message consumer) is developed next.

@Component
public class MinifigListener {

    private static final Logger LOG = LoggerFactory.getLogger(MinifigListener.class);

    @KafkaListener(topics = "${topic.minifig}", groupId = "${topic.minifig.group.id}")
    public void onReceive(@Payload Minifig minifig) {
        LOG.info("New minifig received - {}.", minifig);
    }
}

Its functionality is trivial, It only logs the messages read from the minifig topic, destined for the configured consumer group.

If the the application is started, provided the message broker is up, the listener is ready to receive messages.

INFO 10008 --- [main] o.a.k.clients.consumer.KafkaConsumer     : [Consumer clientId=consumer-group-0-1, groupId=group-0] Subscribed to topic(s): minifig
INFO 10008 --- [ntainer#0-0-C-1] org.apache.kafka.clients.Metadata        : [Consumer clientId=consumer-group-0-1, groupId=group-0] Cluster ID: redpanda.581f9a24-3402-4a17-af28-63353a602421
INFO 10008 --- [ntainer#0-0-C-1] o.a.k.c.c.internals.ConsumerCoordinator  : [Consumer clientId=consumer-group-0-1, groupId=group-0] Discovered group coordinator localhost:19092 (id: 2147483647 rack: null)
INFO 10008 --- [ntainer#0-0-C-1] o.a.k.c.c.internals.ConsumerCoordinator  : [Consumer clientId=consumer-group-0-1, groupId=group-0] Found no committed offset for partition minifig-0
INFO 10008 --- [ntainer#0-0-C-1] o.s.k.l.KafkaMessageListenerContainer    : group-0: partitions assigned: [minifig-0]

In order to check the integration, the following simple test is used. Since a Minifig is expected by the listener, a compliance template was created for convenience.

@SpringBootTest
class AppTest {

    @Autowired
    private KafkaTemplate<String, String> kafkaTemplate;

    @Value("${topic.minifig}")
    private String topic;

    final String template = "{" +
            "\"id\":\"%s\"," +
            "\"size\":\"%s\"," +
            "\"name\":\"%s\"" +
            "}";

    @Test
    void send_compliant() {
        final String minifig = String.format(template,
                UUID.randomUUID(), Minifig.Size.SMALL, "Spider-Man");

        kafkaTemplate.send(topic, minifig);
    }
}

When running the test, a ‘compliant’ message is sent to the broker and as expected, it is successfully picked up by the local consumer.

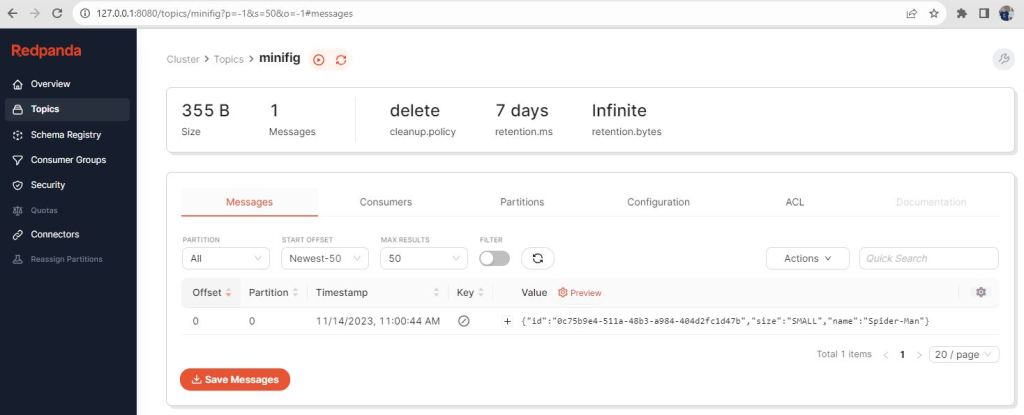
INFO 10008 --- [ntainer#0-0-C-1] c.h.e.listener.MinifigListener           : New minifig received - Minifig[id=0c75b9e4-511a-48b3-a984-404d2fc1d47b, size=SMALL, name=Spider-Man].

Redpanda Console can be helpful in observing what is happening at the broker level, particularly what is flowing through the minifig topic.

In scenarios as the one above, messages are sent from the producer to the consumer via the message broker, as planed.

Recover on Deserialization Failures

In the particular case of this proof of concept, it is assumed the type of a mini-figure can be SMALL, MEDIUM or BIG, in line to the defined Type enum. In case the producer sends a mini-figure of an unknown type, one that deviates a bit from the agreed contract, the messages are basically rejected by the listener, as the payload cannot be de-serialized.

To simulate this, the following test is run.

@SpringBootTest
class AppTest {

    @Autowired
    private KafkaTemplate<String, String> kafkaTemplate;

    @Value("${topic.minifig}")
    private String topic;

    final String template = "{" +
            "\"id\":\"%s\"," +
            "\"size\":\"%s\"," +
            "\"name\":\"%s\"" +
            "}";
    
    @Test
    void send_non_compliant() {
        final String minifig = String.format(template,
                UUID.randomUUID(), "Unknown", "Spider-Man");

        kafkaTemplate.send(topic, minifig);
    }
}

The message reaches the topic, but not the MinifigListener#onReceive() method. As expected, the error appeared when the payload was being unmarshalled. The causes can be depicted by looking deep down the stack trace.

Caused by: org.apache.kafka.common.errors.SerializationException: Can't deserialize data  from topic [minifig]
Caused by: com.fasterxml.jackson.databind.exc.InvalidFormatException: Cannot deserialize value of type `com.hcd.errhandlerdeserializer.domain.Minifig$Size` from String "Unknown": not one of the values accepted for Enum class: [BIG, MEDIUM, SMALL]
 at [Source: (byte[])"{"id":"fbc86874-55ac-4313-bbbb-0ed99341825a","size":"Unknown","name":"Spider-Man"}"; line: 1, column: 53] (through reference chain: com.hcd.errhandlerdeserializer.domain.Minifig["size"])

One other aspect is that the messages are continually tried to be read on the consumer side. This is unfortunate at least from the consumer point of view, as the logs are accumulating.

In order to pass over such situations, the JsonDeserializer used for unmarshalling the payload value is decorated in an ErrorHandlingDeserializer as its actual delegate. Moreover, the ErrorHandlingDeserializer has a failedDeserializationFunction member that according to its JavaDoc, provides an alternative mechanism when the deserialization fails.

The new consumer configuration looks as below:

@Bean
public ConcurrentKafkaListenerContainerFactory<String, Minifig> kafkaListenerContainerFactory() {
	Map<String, Object> props = new HashMap<>();
	props.put(ConsumerConfig.BOOTSTRAP_SERVERS_CONFIG, brokerUrl);
	props.put(ConsumerConfig.KEY_DESERIALIZER_CLASS_CONFIG, StringDeserializer.class);
	props.put(ConsumerConfig.VALUE_DESERIALIZER_CLASS_CONFIG, JsonDeserializer.class);
	props.put(ConsumerConfig.GROUP_ID_CONFIG, groupId);
	props.put(JsonDeserializer.TRUSTED_PACKAGES, Minifig.class.getPackageName());
	props.put(JsonDeserializer.VALUE_DEFAULT_TYPE, Minifig.class.getName());

	JsonDeserializer<Minifig> jsonDeserializer = new JsonDeserializer<>(Minifig.class);

	ErrorHandlingDeserializer<Minifig> valueDeserializer = new ErrorHandlingDeserializer<>(jsonDeserializer);
	valueDeserializer.setFailedDeserializationFunction(new MinifigFailedDeserializationFunction());

	DefaultKafkaConsumerFactory<String, Minifig> defaultFactory = new DefaultKafkaConsumerFactory<>(props,
			new StringDeserializer(), valueDeserializer);

	ConcurrentKafkaListenerContainerFactory<String, Minifig> factory = new ConcurrentKafkaListenerContainerFactory<>();
	factory.setConsumerFactory(defaultFactory);
	factory.setCommonErrorHandler(new DefaultErrorHandler());
	return factory;
}

The failedDeserializationFunction used here is simplistic, but the reason is to prove its utility.

public class MinifigFailedDeserializationFunction implements Function<FailedDeserializationInfo, Minifig> {

    private static final Logger LOG = LoggerFactory.getLogger(MinifigFailedDeserializationFunction.class);

    @Override
    public Minifig apply(FailedDeserializationInfo failedDeserializationInfo) {
        final Exception exception = failedDeserializationInfo.getException();
        LOG.info("Error deserializing minifig - {}", exception.getCause().getMessage());
        return new Minifig("Default");
    }
}

The FailedDeserializationInfo entity (the Function#apply() input) is constructed during the recovery from the de-serialization exception and it encapsulates various pieces of information (here, the exception is the one leveraged).
Since the output of the apply() method is the actual deserialization result, one may return either null or whatever it is suitable depending on the aimed behavior.

If running the send_non_compliant() test again, the deserialization exception is handled and a default value is returned. Further, the MinifigListener is invoked and has the opportunity to deal with it.

INFO 30160 --- [ntainer#0-0-C-1] e.l.MinifigFailedDeserializationFunction : Error deserializing minifig - Cannot deserialize value of type `com.hcd.errhandlerdeserializer.domain.Minifig$Size` from String "Unknown": not one of the values accepted for Enum class: [BIG, MEDIUM, SMALL]
 at [Source: (byte[])"{"id":"f35a77bf-29e5-4f5c-b5de-cc674f22029f","size":"Unknown","name":"Spider-Man"}"; line: 1, column: 53] (through reference chain: com.hcd.errhandlerdeserializer.domain.Minifig["size"])
INFO 30160 --- [ntainer#0-0-C-1] c.h.e.listener.MinifigListener           : New minifig received - Minifig[id=null, size=SMALL, name=Undefined].

Conclusion

Configuring Kafka producers and consumers and fine-tuning them in order to achieve the desired performance in accordance to the used message brokers is not always straight-forward. Controlling each step of the communication is by all means something desirable and moreover, acting fast to unknown situations helps delivering robust and easy to maintain solutions. This post focused on the deserialization issues that might appear at Kafka consumers level and provided with a way of having a second plan when dealing with non compliant payloads.

Sample Code

Available here – https://github.com/horatiucd/err-handler-deserializer

Resources

  1. Redpanda Quickstart
  2. Spring for Apache Kafka Reference
  3. The picture was taken at Zoo Brasov, Romania

Stream Summary Statistics

by Horatiu Dan

Context

In order to be able to leverage various capabilities of the Java Streams, one shall first understand two general concepts – the stream and the stream pipeline. A Stream in Java is a sequential flow of data. A stream pipeline on the other hand, represents a series of steps applied to data, series that ultimately produce a result.

My family and I recently visited the Legoland Resort in Germany – a great place by the way – and there, among other attractions, we had the chance to observe in detail a sample of the brick building process. Briefly, everything starts from the granular plastic that is melted, modeled accordingly, assembled, painted, stenciled if needed and packed up in bags and boxes. All the steps are part of an assembly factory pipeline.

What is worth mentioning is the fact that the next step cannot be done until the previous one has completed and also that the number of steps is finite. Moreover, at every step, each Lego element is touched to perform the corresponding operation and then it moves only forward, never backwards, so that the next step is done. The same applies to Java streams.

In functional programming, the steps are called stream operations and they are of three categories – one that starts the job (source), one that ends it and produces the result (terminal) and a couple of intermediate ones in between.

As a last consideration it’s worth mentioning the intermediate operations have the ability to transform the stream into another one, but are never run until the terminal operation runs (they are lazy evaluated). Finally, once the result is produced and the initial scope achieved, the stream is no longer valid.

Abstract

Having as starting point the fact that in case of Java Streams once the terminal stream operation is done, the stream is no longer valid, this article aims to present a way of computing multiple operations at once through only one stream traversal. It is accomplished by leveraging the Java summary statistics objects (in particular IntSummaryStatistics) that reside since version 1.8.

Proof of Concept

The small project built especially to show case the statistics computation uses the following:

  • Java 17
  • Maven 3.6.3
  • JUnit Jupiter Engine v.5.9.3

As domain, there is one straight forward entity – a parent.

public record Parent(String name, int age) { }

It is modeled by two attributes – the name and its age. While the name is present only for being able to distinguish the parents, the age is the one of interest here.

The purpose is to be able to compute a few age statistics on a set of parents, that is:

  • the total sample count
  • the ages of the youngest and the oldest parent
  • the age range of the group
  • the average age
  • the total number of years the parents accumulate.

The results are encapsulated into a ParentStats structure, represented as a record as well.

public record ParentStats(long count,
                          int youngest,
                          int oldest,
                          int ageRange,
                          double averageAge,
                          long totalYearsOfAge) { }

In order to accomplish this, an interface is defined.

public interface Service {

    ParentStats getStats(List<Parent> parents);
}

For now, it has only one method that receives an input a list of Parents and provides as output the desired statistics.

Initial Implementation

As the problem is trivial, an initial and imperative implementation of the service might be as below:

public class InitialService implements Service {

    @Override
    public ParentStats getStats(List<Parent> parents) {
        int count = parents.size();
        int min = Integer.MAX_VALUE;
        int max = 0;
        int sum = 0;
        for (Parent human : parents) {
            int age = human.age();
            if (age < min) {
                min = age;
            }
            if (age > max) {
                max = age;
            }
            sum += age;
        }

        return new ParentStats(count, min, max, max - min, (double) sum/count, sum);
    }
}

The code looks clear, but it seems too focused on the how rather than on the what, thus the problem seems to get lost in the implementation and the code hard to read.

As the functional style and streams are already part of every Java developer’s practices, most probably the next service implementation would be chosen.

public class StreamService implements Service {

    @Override
    public ParentStats getStats(List<Parent> parents) {
        int count = parents.size();

        int min = parents.stream()
                .mapToInt(Parent::age)
                .min()
                .orElseThrow(RuntimeException::new);

        int max = parents.stream()
                .mapToInt(Parent::age)
                .max()
                .orElseThrow(RuntimeException::new);

        int sum = parents.stream()
                .mapToInt(Parent::age)
                .sum();

        return new ParentStats(count, min, max, max - min, (double) sum/count, sum);
    }
}

The code is more readable now, the downside though is the stream traversal redundancy for computing all the desired stats – three times in this particular case. As stated in the beginning of the article, once the terminal operation is done – min, max, sum – the stream is no longer valid. It would be convenient to be able to compute the aimed statistics without having to loop the list of parents multiple times.

Summary Statistics Implementation

In Java, there is a series of objects called SummaryStatistics which come as different types – IntSummaryStatistics, LongSummaryStatistics, DoubleSummaryStatistics.

According to the JavaDoc, IntSummaryStatistics is “a state object for collecting statistics such as count, min, max, sum and average. The class is designed to work with (though does not require) streams”. [Resource 1]

It is a good candidate for the initial purpose, thus the following implementation of the Service seems the preferred one.

public class StatsService implements Service {

    @Override
    public ParentStats getStats(List<Parent> parents) {
        IntSummaryStatistics stats = parents.stream()
                .mapToInt(Parent::age)
                .summaryStatistics();

        return new ParentStats(stats.getCount(),
                stats.getMin(),
                stats.getMax(),
                stats.getMax() - stats.getMin(),
                stats.getAverage(),
                stats.getSum());
    }
}

There is only one stream of parents, the statistics get computed and the code is way readable this time.

In order to check all three implementations, the following abstract base unit test is used.

abstract class ServiceTest {

    private Service service;

    private List<Parent> mothers;
    private List<Parent> fathers;
    private List<Parent> parents;

    protected abstract Service setupService();

    @BeforeEach
    void setup() {
        service = setupService();

        mothers = IntStream.rangeClosed(1, 3)
                .mapToObj(i -> new Parent("Mother" + i, i + 30))
                .collect(Collectors.toList());

        fathers = IntStream.rangeClosed(4, 6)
                .mapToObj(i -> new Parent("Father" + i, i + 30))
                .collect(Collectors.toList());

        parents = new ArrayList<>(mothers);
        parents.addAll(fathers);
    }

    private void assertParentStats(ParentStats stats) {
        Assertions.assertNotNull(stats);
        Assertions.assertEquals(6, stats.count());
        Assertions.assertEquals(31, stats.youngest());
        Assertions.assertEquals(36, stats.oldest());
        Assertions.assertEquals(5, stats.ageRange());

        final int sum = 31 + 32 + 33 + 34 + 35 + 36;

        Assertions.assertEquals((double) sum/6, stats.averageAge());
        Assertions.assertEquals(sum, stats.totalYearsOfAge());
    }

    @Test
    void getStats() {
        final ParentStats stats = service.getStats(parents);
        assertParentStats(stats);
    }
}

As the stats are computed for all the parents, the mothers and fathers are first put together in the same parents list (we will see later why there were two lists in the first place).

The particular unit-test for each implementation is trivial – it sets up the service instance.

class StatsServiceTest extends ServiceTest {

    @Override
    protected Service setupService() {
        return new StatsService();
    }
}

Combining Statistics

In addition to the already used methods – getMin(), getMax(), getCount(), getSum(), getAverage()IntSummaryStatistics provides a way to combine the state of another similar object into the current one.

void combine(IntSummaryStatistics other)

As we saw in the above unit-test, initially there are two source lists – mothers and fathers. It would be convenient to be able to directly compute the statistics, without first merging them.

In order to accomplish this, the Service is enriched with the following method.

default ParentStats getCombinedStats(List<Parent> mothers, List<Parent> fathers) {
	final List<Parent> parents = new ArrayList<>(mothers);
	parents.addAll(fathers);
	return getStats(parents);
}

The first two implementations – InitialService and StreamService – are not of interest here, thus a default implementation was provided for convenince. It is overwritten only by the StatsService.

@Override
public ParentStats getCombinedStats(List<Parent> mothers, List<Parent> fathers) {
	Collector<Parent, ?, IntSummaryStatistics> collector = Collectors.summarizingInt(Parent::age);

	IntSummaryStatistics stats = mothers.stream().collect(collector);
	stats.combine(fathers.stream().collect(collector));

	return new ParentStats(stats.getCount(),
			stats.getMin(),
			stats.getMax(),
			stats.getMax() - stats.getMin(),
			stats.getAverage(),
			stats.getSum());
}

By leveraging the combine() method, the statistics can be merged directly as different source lists are available.

The corresponding unit test is straight-forward.

@Test
void getCombinedStats() {
	final ParentStats stats = service.getCombinedStats(mothers, fathers);
	assertParentStats(stats);
}

Having seen the above Collector, the initial getStats() method may be written even more briefly.

@Override
public ParentStats getStats(List<Parent> parents) {
	IntSummaryStatistics stats = parents.stream()
			.collect(Collectors.summarizingInt(Parent::age));

	return new ParentStats(stats.getCount(),
			stats.getMin(),
			stats.getMax(),
			stats.getMax() - stats.getMin(),
			stats.getAverage(),
			stats.getSum());
}

Conclusion

Depending on the used data types, IntSummaryStatistics, LongSummaryStatistics or DoubleSummaryStatistics are convenient out-of-the-box structures that one can use to quickly compute simple statistics and focus on writing more readable and maintainable code.

Resources

  1. IntSummaryStatistics JavaDoc
  2. Source code for the sample POC
  3. The picture was taken at Legoland Resort, Germany

Idempotent Liquibase Change Sets

by Horatiu Dan

Abstract

“Idempotence is the property of certain operations in mathematics and computer science whereby they can be applied multiple times without changing the result beyond the initial application” [Resource 3].

The purpose of this article is to outline a few ways of creating idempotent changes when the database modifications are managed with Liquibase. Throughout the life time of a software product that has such tier, various database modifications are being applied as it evolves. The more robust the modifications are, the more maintainable the solution is. In order to accomplish such a way of working, it is usually a good practice to design the executed change sets to have zero side effects, that is to be able to be run as many times as needed with the same end result.

The simple proof of concept built here aims to show case how Liquibase change sets may be written to be idempotent. Moreover, the article explains in more depth what exactly happens when the application starts.

Set-up

  • Java 17
  • Spring Boot v.3.1.0
  • Liquibase 4.20.0
  • PostgreSQL Driver 42.6.0
  • Maven 3.6.3

Proof of Concept

As PostgreSQL is the database used here, first and foremost one shall create a new schema – liquidempo. This operation is easy to accomplish by issuing the following SQL command, once connected to the database.

create schema liquidempo;

At application level:

  • The Maven Spring Boot project is created and configured to use the PostgreSQL Driver, Spring Data JPA and Liquibase dependencies.
  • A simple entity is created – Human – with only one attribute, a unique identifier which is also the primary key at database level.
@Entity
@Table(name = "human")
@SequenceGenerator(sequenceName = "human_seq", name = "CUSTOM_SEQ_GENERATOR", allocationSize = 1)
public class Human {

    @Id
    @GeneratedValue(strategy = GenerationType.AUTO, generator = "CUSTOM_SEQ_GENERATOR")
    @Column(name = "id")
    private Long id;

    public Long getId() {
        return id;
    }

    public void setId(Long id) {
        this.id = id;
    }
}

For convenience, when entities are stored, their unique identifiers are generated using a database sequence, called human_seq.

  • The data source is configured as usual in the application.properties file
spring.datasource.type=com.zaxxer.hikari.HikariDataSource
spring.datasource.url=jdbc:postgresql://localhost:5432/postgres?currentSchema=liquidempo&useUnicode=true&characterEncoding=utf8&useSSL=false&allowPublicKeyRetrieval=true
spring.datasource.username=postgres
spring.datasource.password=123456

spring.jpa.database-platform=org.hibernate.dialect.PostgreSQLDialect
spring.jpa.hibernate.ddl-auto=none

The previously created schema is referred in the connection URL. DDL handling is disabled, as the infrastructure and the data are intended to be persistent when the application is restarted.

  • As Liquibase is the database migration manager, the changelog path is configured in the application.properties file as well.
spring.liquibase.change-log=classpath:/db/changelog/db.changelog-root.xml

For now, the db.changelog-root.xml file is empty.

The current state of the project requires a few simple change sets, in order to create the database elements depicted around the Human entity – the table, the sequence and the primary key constraint.

<?xml version="1.0" encoding="UTF-8"?>
<databaseChangeLog
        xmlns="http://www.liquibase.org/xml/ns/dbchangelog"
        xmlns:xsi="http://www.w3.org/2001/XMLSchema-instance"
        xsi:schemaLocation="http://www.liquibase.org/xml/ns/dbchangelog
                      https://www.liquibase.org/xml/ns/dbchangelog/dbchangelog-4.17.xsd">

    <changeSet author="horatiucd" id="100">
        <createSequence sequenceName="human_seq" startValue="1" incrementBy="1"/>
    </changeSet>

    <changeSet author="horatiucd" id="200">
        <createTable tableName="human">
            <column name="id" type="BIGINT">
                <constraints nullable="false"/>
            </column>
        </createTable>
    </changeSet>

    <changeSet author="horatiucd" id="300">
        <addPrimaryKey columnNames="id" constraintName="human_pk" tableName="human"/>
    </changeSet>

</databaseChangeLog>

In order for these to be applied, they need to be recorded as part of db.changelog-root.xml file, as indicated below.

<?xml version="1.0" encoding="UTF-8"?>
<databaseChangeLog
        xmlns="http://www.liquibase.org/xml/ns/dbchangelog"
        xmlns:xsi="http://www.w3.org/2001/XMLSchema-instance"
        xsi:schemaLocation="http://www.liquibase.org/xml/ns/dbchangelog
                      https://www.liquibase.org/xml/ns/dbchangelog/dbchangelog-4.17.xsd">

    <include file="db/changelog/human_init.xml"/>

</databaseChangeLog>

When the application is restarted, the three change sets are executed in the order they are declared.

INFO 9092 --- [main] liquibase.database      : Set default schema name to liquidempo
INFO 9092 --- [main] liquibase.lockservice   : Successfully acquired change log lock
INFO 9092 --- [main] liquibase.changelog     : Creating database history table with name: liquidempo.databasechangelog
INFO 9092 --- [main] liquibase.changelog     : Reading from liquidempo.databasechangelog
Running Changeset: db/changelog/human_init.xml::100::horatiucd
INFO 9092 --- [main] liquibase.changelog     : Sequence human_seq created
INFO 9092 --- [main] liquibase.changelog     : ChangeSet db/changelog/human_init.xml::100::horatiucd ran successfully in 6ms
Running Changeset: db/changelog/human_init.xml::200::horatiucd
INFO 9092 --- [main] liquibase.changelog     : Table human created
INFO 9092 --- [main] liquibase.changelog     : ChangeSet db/changelog/human_init.xml::200::horatiucd ran successfully in 4ms
Running Changeset: db/changelog/human_init.xml::300::horatiucd
INFO 9092 --- [main] liquibase.changelog     : Primary key added to human (id)
INFO 9092 --- [main] liquibase.changelog     : ChangeSet db/changelog/human_init.xml::300::horatiucd ran successfully in 8ms
INFO 9092 --- [main] liquibase               : Update command completed successfully.
INFO 9092 --- [main] liquibase.lockservice   : Successfully released change log lock

Moreover, they are recorded as separate rows in the databasechangelog database table.

+---+---------+---------------------------+--------------------------+-------------+--------+----------------------------------+------------------------------------------------------+
|id |author   |filename                   |dateexecuted              |orderexecuted|exectype|md5sum                            |description                                           |
+---+---------+---------------------------+--------------------------+-------------+--------+----------------------------------+------------------------------------------------------+
|100|horatiucd|db/changelog/human_init.xml|2023-05-26 16:23:17.184239|1            |EXECUTED|8:db8c5fb392dc96efa322da2c326b5eba|createSequence sequenceName=human_seq                 |
|200|horatiucd|db/changelog/human_init.xml|2023-05-26 16:23:17.193031|2            |EXECUTED|8:ed8e5e7df5edb17ed9a0682b9b640d7f|createTable tableName=human                           |
|300|horatiucd|db/changelog/human_init.xml|2023-05-26 16:23:17.204184|3            |EXECUTED|8:a2d6eff5a1e7513e5ab7981763ae532b|addPrimaryKey constraintName=human_pk, tableName=human|
+---+---------+---------------------------+--------------------------+-------------+--------+----------------------------------+------------------------------------------------------+

So far, everything is straight forward, nothing out of the ordinary – a simple Spring Boot application whose database changes are managed with Liquibase.

When examining the above human_init.xml file, one can easily depict the three scripts that result from the three changesets. None is idempotent. It means that if they are executed again (although there is no reason for doing it here) errors will occur because the human_seq sequence, the human table and the human_pk primary key already exist.

Idempotent Change Sets

If the SQL code that results from the XML change sets had been written directly and aimed to be idempotent, it would have read as follows:

CREATE SEQUENCE IF NOT EXISTS human_seq INCREMENT 1 MINVALUE 1 MAXVALUE 99999999999;

CREATE TABLE IF NOT EXISTS human (
	id SERIAL CONSTRAINT human_pk PRIMARY KEY
);

If the two commands are executed several times, no errors occur and the outcome remains the same. After the first run, the sequence, the table and the constraint are created, then every new execution leaves them in the same usable state.

The aim is to accomplish the same in the written Liquibase change sets (change log).

According to the Liquibase documentation [Resource 1] – “Preconditions are tags you add to your changelog or individual changesets to control the execution of an update based on the state of the database. Preconditions let you specify security and standardization requirements for your changesets. If a precondition on a changeset fails, Liquibase does not deploy that changeset.”

These constructs may be configured in various ways, either at change log or change set level. For simplicity, the three change sets of this proof of concept will be made idempotent.

Basically, whenever a change set fails to execute because the entity (sequence, table or primary key) already exists, it would be convenient to continue and not halt the execution of the entire change log and not be able to start the application.

In this direction, Liquibase preconditions provides at least two options:

  • either skip over the changeset and continue with the change log, or
  • skip over the change set but mark it as executed and continue with the change log.

Either of the two can be configured by adding a preConditions tag in the change set of interest and setting the onFail attribute as CONTINUE (the former case) or MARK_RAN (the latter case).

In pseudo-code, this looks as below:

<changeSet author="horatiucd" id="100">
	<preConditions onFail="CONTINUE or MARK_RAN">
		...
	</preConditions>
	...
</changeSet>

This seems in line to the initial desire – execute the change set only if the preconditions are met. Next, each of the two situations is analyzed.

onFail=”CONTINUE”

The change log file – human_init_idempo_continue.xml – becomes as below:

<?xml version="1.0" encoding="UTF-8"?>
<databaseChangeLog
        xmlns="http://www.liquibase.org/xml/ns/dbchangelog"
        xmlns:xsi="http://www.w3.org/2001/XMLSchema-instance"
        xsi:schemaLocation="http://www.liquibase.org/xml/ns/dbchangelog
                      https://www.liquibase.org/xml/ns/dbchangelog/dbchangelog-4.17.xsd">

    <changeSet author="horatiucd" id="101">
        <preConditions onFail="CONTINUE">
            <not>
                <sequenceExists sequenceName="human_seq"/>
            </not>
        </preConditions>
        <createSequence sequenceName="human_seq" startValue="1" incrementBy="1"/>
    </changeSet>

    <changeSet author="horatiucd" id="201">
        <preConditions onFail="CONTINUE">
            <not>
                <tableExists tableName="human"/>
            </not>
        </preConditions>
        <createTable tableName="human">
            <column name="id" type="BIGINT">
                <constraints nullable="false"/>
            </column>
        </createTable>
    </changeSet>

    <changeSet author="horatiucd" id="301">
        <preConditions onFail="CONTINUE">
            <not>
                <primaryKeyExists primaryKeyName="human_pk" tableName="human"/>
            </not>
        </preConditions>
        <addPrimaryKey columnNames="id" constraintName="human_pk" tableName="human"/>
    </changeSet>

</databaseChangeLog>

For each item, the precondition checks if it does not exist.

When running the application, the log shows what is executed:

INFO 49016 --- [main] liquibase.database     : Set default schema name to liquidempo
INFO 49016 --- [main] liquibase.changelog    : Reading from liquidempo.databasechangelog
INFO 49016 --- [main] liquibase.lockservice  : Successfully acquired change log lock
Running Changeset: db/changelog/human_init_idempo_continue.xml::101::horatiucd
INFO 49016 --- [main] liquibase.changelog    : Continuing past: db/changelog/human_init_idempo_continue.xml::101::horatiucd despite precondition failure due to onFail='CONTINUE': 
          db/changelog/db.changelog-root.xml : Not precondition failed
Running Changeset: db/changelog/human_init_idempo_continue.xml::201::horatiucd
INFO 49016 --- [main] liquibase.changelog    : Continuing past: db/changelog/human_init_idempo_continue.xml::201::horatiucd despite precondition failure due to onFail='CONTINUE': 
          db/changelog/db.changelog-root.xml : Not precondition failed
Running Changeset: db/changelog/human_init_idempo_continue.xml::301::horatiucd
INFO 49016 --- [main] liquibase.changelog    : Continuing past: db/changelog/human_init_idempo_continue.xml::301::horatiucd despite precondition failure due to onFail='CONTINUE': 
          db/changelog/db.changelog-root.xml : Not precondition failed
INFO 49016 --- [main] liquibase              : Update command completed successfully.
INFO 49016 --- [main] liquibase.lockservice  : Successfully released change log lock

As expected, all three preconditions failed and the execution of the change log continued.

The databasechangelog database table does not have any records in addition to the previous three, which means the change sets will be attempted to be executed again at the next start-up of the application.

onFail=”MARK_RAN”

The change log file – human_init_idempo_mark_ran.xml – is similar to the one in human_init_idempo_continue.xml, the only difference is the onFail attribute, which is set as onFail="MARK_RAN".

The db.changelog-root.xml root change log now looks as below:

<?xml version="1.0" encoding="UTF-8"?>
<databaseChangeLog
        xmlns="http://www.liquibase.org/xml/ns/dbchangelog"
        xmlns:xsi="http://www.w3.org/2001/XMLSchema-instance"
        xsi:schemaLocation="http://www.liquibase.org/xml/ns/dbchangelog
                      https://www.liquibase.org/xml/ns/dbchangelog/dbchangelog-4.17.xsd">

    <include file="db/changelog/human_init.xml"/>
    <include file="db/changelog/human_init_idempo_continue.xml"/>
    <include file="db/changelog/human_init_idempo_mark_ran.xml"/>
    
</databaseChangeLog>

For this proof of concept, all three files were kept on purpose, in order to be able to observe the behavior in detail.

If the application is restarted, no errors are encountered and the log depicts the following:

INFO 38788 --- [main] liquibase.database      : Set default schema name to liquidempo
INFO 38788 --- [main] liquibase.changelog     : Reading from liquidempo.databasechangelog
INFO 38788 --- [main] liquibase.lockservice   : Successfully acquired change log lock
INFO 38788 --- [main] liquibase.changelog     : Reading from liquidempo.databasechangelog
Running Changeset: db/changelog/human_init_idempo_continue.xml::101::horatiucd
INFO 38788 --- [main] liquibase.changelog     : Continuing past: db/changelog/human_init_idempo_continue.xml::101::horatiucd despite precondition failure due to onFail='CONTINUE': 
          db/changelog/db.changelog-root.xml : Not precondition failed
Running Changeset: db/changelog/human_init_idempo_continue.xml::201::horatiucd
INFO 38788 --- [main] liquibase.changelog     : Continuing past: db/changelog/human_init_idempo_continue.xml::201::horatiucd despite precondition failure due to onFail='CONTINUE': 
          db/changelog/db.changelog-root.xml : Not precondition failed
Running Changeset: db/changelog/human_init_idempo_continue.xml::301::horatiucd
INFO 38788 --- [main] liquibase.changelog     : Continuing past: db/changelog/human_init_idempo_continue.xml::301::horatiucd despite precondition failure due to onFail='CONTINUE': 
          db/changelog/db.changelog-root.xml : Not precondition failed
Running Changeset: db/changelog/human_init_idempo_mark_ran.xml::101::horatiucd
INFO 38788 --- [main] liquibase.changelog     : Marking ChangeSet: "db/changelog/human_init_idempo_mark_ran.xml::101::horatiucd" as ran despite precondition failure due to onFail='MARK_RAN': 
          db/changelog/db.changelog-root.xml : Not precondition failed
Running Changeset: db/changelog/human_init_idempo_mark_ran.xml::201::horatiucd
INFO 38788 --- [main] liquibase.changelog     : Marking ChangeSet: "db/changelog/human_init_idempo_mark_ran.xml::201::horatiucd" as ran despite precondition failure due to onFail='MARK_RAN': 
          db/changelog/db.changelog-root.xml : Not precondition failed
Running Changeset: db/changelog/human_init_idempo_mark_ran.xml::301::horatiucd
INFO 38788 --- [main] liquibase.changelog     : Marking ChangeSet: "db/changelog/human_init_idempo_mark_ran.xml::301::horatiucd" as ran despite precondition failure due to onFail='MARK_RAN': 
          db/changelog/db.changelog-root.xml : Not precondition failed
INFO 38788 --- [main] liquibase               : Update command completed successfully.
INFO 38788 --- [main] liquibase.lockservice   : Successfully released change log lock

The change sets with onFail="CONTINUE" were tried to be re-executed, as this is a new attempt, while the ones with onFail="MARK_RAN" were marked in the databasechangelog and will be passed over at the next star-up.

+---+---------+-------------------------------------------+--------------------------+-------------+--------+----------------------------------+------------------------------------------------------+
|id |author   |filename                                   |dateexecuted              |orderexecuted|exectype|md5sum                            |description                                           |
+---+---------+-------------------------------------------+--------------------------+-------------+--------+----------------------------------+------------------------------------------------------+
|100|horatiucd|db/changelog/human_init.xml                |2023-05-26 16:23:17.184239|1            |EXECUTED|8:db8c5fb392dc96efa322da2c326b5eba|createSequence sequenceName=human_seq                 |
|200|horatiucd|db/changelog/human_init.xml                |2023-05-26 16:23:17.193031|2            |EXECUTED|8:ed8e5e7df5edb17ed9a0682b9b640d7f|createTable tableName=human                           |
|300|horatiucd|db/changelog/human_init.xml                |2023-05-26 16:23:17.204184|3            |EXECUTED|8:a2d6eff5a1e7513e5ab7981763ae532b|addPrimaryKey constraintName=human_pk, tableName=human|
|101|horatiucd|db/changelog/human_init_idempo_mark_ran.xml|2023-05-29 16:40:26.453305|4            |MARK_RAN|8:db8c5fb392dc96efa322da2c326b5eba|createSequence sequenceName=human_seq                 |
|201|horatiucd|db/changelog/human_init_idempo_mark_ran.xml|2023-05-29 16:40:26.463021|5            |MARK_RAN|8:ed8e5e7df5edb17ed9a0682b9b640d7f|createTable tableName=human                           |
|301|horatiucd|db/changelog/human_init_idempo_mark_ran.xml|2023-05-29 16:40:26.475153|6            |MARK_RAN|8:a2d6eff5a1e7513e5ab7981763ae532b|addPrimaryKey constraintName=human_pk, tableName=human|
+---+---------+-------------------------------------------+--------------------------+-------------+--------+----------------------------------+------------------------------------------------------+

At the next run of the application, the log will be similar to the one where the onFail was set on "CONTINUE".

One more observation is worth making at this point. In case a change set whose preconditions do not fail, they are executed normally and recorded with exectype = EXECUTED in the databasechangelog table.

Conclusions

This article presented two ways of writing idempotent Liquibase change sets, practice that allows having more robust and easy to maintain applications. This was accomplished by leveraging the change set preConditions tag inside the change log files. While both onFail attribute values – CONTINUE and MARK_RAN – may be used depending on the actual performed operation, the latter seems more appropriate for this proof of concept as it does not attempt to re-run the change sets at every start-up of the application.

Resources

  1. Liquibase Documentation
  2. Source code for the sample application
  3. Idempotence

Mocking Angular Applications’ Backend

by Horatiu Dan

Nowadays, most products have their front-ends and back-ends fully decoupled and sometimes developed by different teams. Once the communication interfaces have been agreed upon, the ‘parts’ may be developed either individually, following distinct paths, or together. Irrespective of this aspect, when developing the front-end it is very convenient to be able to focus on its main functionalities and the interaction with the back-end and treat the latter as a black-box.

This post presents a few ways of mocking the data consumed in an Angular application, so that the evolution of the product is smooth and not completely dependent on the back-end services, especially during its development.

Set-up

The front-end application displays a page with Ninjago Series characters, together with a few attributes – name, type, season they first appear in, whether they are favorite or not.

The real data is stored in a database and provided via REST by a back-end service. The assumption is the back-end is not available at this moment, yet the front-end needs to be developed.

The Project

A character is modeled as below (character.ts)

export interface Character {
  id: number;
  type: string;
  name: string;
  season: number;
  favorite: boolean;
}

and rendered in the UI in as a simple component (character.component)

  • character.component.html
<strong>{{ character.name }}</strong>
<div>Type: {{ character.type }}</div>
<div>First seen in season: {{ character.season }}</div>
<div>Favorite: {{ character.favorite }}</div>
<br>
  • character.component.ts
import {Component, Input, OnInit} from '@angular/core';
import {Character} from './character';

@Component({
  selector: 'app-character',
  templateUrl: './character.component.html',
  styleUrls: ['./character.component.css']
})
export class CharacterComponent implements OnInit {

  @Input() character: Character;

  constructor() { }

  ngOnInit(): void {
  }
}

All available characters are displayed in a separate list component (character-list.component).

  • character-list.component.html
<app-character
  *ngFor="let character of characters"
  [character]="character"></app-character>
  • character-list.component.ts
import { Component, OnInit } from '@angular/core';
import {Character} from '../character/character';
import {CharacterService} from '../services/character.service';

@Component({
  selector: 'app-character-list',
  templateUrl: './character-list.component.html',
  styleUrls: ['./character-list.component.css']
})
export class CharacterListComponent implements OnInit {

  characters: Character[];

  constructor(private characterService: CharacterService) { }

  ngOnInit(): void {
    this.initCharacters();
  }

  private initCharacters(): void {
    this.characterService.getCharacters()
      .subscribe(characters => this.characters = characters);
  }
}

As shown above, the data is retrieved via the CharacterService that is injected in the component and stored in the characters array.

In the following sections, 3 ways to simulate the real data flow are presented – the first one is trivial, while the next ones a little bit more interesting and useful.

Mock Data Directly

If we look at the method that populates the characters array in the CharacterListComponentinitCharacters() – we see a call to the getCharacters() service method which is triggered once a subscription is fulfilled, thus the signature of the method is as below.

getCharacters(): Observable<Character[]>

The most straight forward mock implementation of the service is to return the stored array using the rxjs of() function.

import { Injectable } from '@angular/core';
import {Observable, of} from 'rxjs';
import {Character} from '../character/character';

@Injectable({
  providedIn: 'root'
})
export class CharacterService {

  private characters: Character[] = [
    {
      id: 1,
      name: 'Jay',
      type: 'Good',
      season: 1,
      favorite: true
    },
    {
      id: 2,
      name: 'Vanghelis',
      type: 'Evil',
      season: 13,
      favorite: false
    },
    {
      id: 3,
      name: 'Overlord',
      type: 'Evil',
      season: 2,
      favorite: false
    },
    {
      id: 4,
      name: 'Aspheera',
      type: 'Evil',
      season: 11,
      favorite: false
    },
    {
      id: 5,
      name: 'Kay',
      type: 'Good',
      season: 1,
      favorite: true
    }
  ];

  constructor() { }

  getCharacters(): Observable<Character[]> {
    return of(this.characters);
  }
}

If the application is run, the data is serviced and rendered in the UI.

No styling is applied, thus the simplistic appearance.

This is the most straight-forward approach to mock this service, it may be used in a very incipient phase of development, but it is completely unreliable in my opinion. CharacterService is in a temporary state and it will be surely changed when the actual integration with the back-end is done.

The source code for this stage is here – https://github.com/horatiucd/ninjago-front-end/tree/v2.0.0.

Mock using an HttpInterceptor

Angular has a module called HttpClientModule destined for working with HTTP calls from the client. This is an optional module that is included if needed.

As the data between the back-end and the front-end is exchanged via REST, CharacterService uses HttpClient to trigger requests. To make it possible, app.module.ts imports HttpClientModule and declares it as part of the @NgModule imports array.

import {HttpClientModule} from '@angular/common/http';

@NgModule({
  declarations: [
    AppComponent,
    CharacterListComponent,
    CharacterComponent
  ],
  imports: [
    BrowserModule,
    AppRoutingModule,
    HttpClientModule
  ],
  providers: [],
  bootstrap: [AppComponent]
})
export class AppModule { }

CharacterService is modified to its final version:

import {Injectable} from '@angular/core';
import {Observable} from 'rxjs';
import {Character} from '../character/character';
import {HttpClient} from '@angular/common/http';
import {map} from 'rxjs/operators';

@Injectable({
  providedIn: 'root'
})
export class CharacterService {

  constructor(private http: HttpClient) { }

  getCharacters(): Observable<Character[]> {
    return this.http.get<Character[]>('/api/v1/characters')
      .pipe(map(data => {
        if (data === null) {
          return [];
        }
        return data.map((character: Character) => character);
      }));
  }
}

getCharacters() method is now in its final form – it performs a HTTP GET to /api/v1/characters endpoint and if available, the data is received. As mentioned before, currently the back-end is not available. Thus, in order for the project to evolve, it needs to be self-contained. Instead of interrogating the real remote server, an HTTP interceptor is used instead, which provides the mocked data.

First the array of characters is moved to /mocks/characters.ts file so that is easily referred to from now on.

export const CHARACTERS: Character[] = [
  {
    id: 1,
    name: 'Jay',
    type: 'Good',
    season: 1,
    favorite: true
  },
  {
    id: 2,
    name: 'Vanghelis',
    type: 'Evil',
    season: 13,
    favorite: false
  },
  {
    id: 3,
    name: 'Overlord',
    type: 'Evil',
    season: 2,
    favorite: false
  },
  {
    id: 4,
    name: 'Aspheera',
    type: 'Evil',
    season: 11,
    favorite: false
  },
  {
    id: 5,
    name: 'Kay',
    type: 'Good',
    season: 1,
    favorite: true
  }
];

Secondly, as part of the same /mocks directory, an HttpInterceptor injectable implementation is created.

import {Injectable} from '@angular/core';
import {HttpEvent, HttpHandler, HttpInterceptor, HttpRequest, HttpResponse} from '@angular/common/http';
import {Observable} from 'rxjs';
import {Character} from '../character/character';
import {CHARACTERS} from './characters';

@Injectable({
  providedIn: 'root'
})
export class CharacterServiceInterceptor implements HttpInterceptor {

  private readonly GET_CHARACTERS_URL = '/api/v1/characters';

  intercept(req: HttpRequest<any>, next: HttpHandler): Observable<HttpEvent<any>> {
    if (req.url === this.GET_CHARACTERS_URL && req.method === 'GET') {
      return this.getCharacters();
    }
    return next.handle(req);
  }

  private getCharacters(): Observable<HttpResponse<Character[]>> {
    return new Observable<HttpResponse<Character[]>>(observer => {
      observer.next(new HttpResponse<Character[]>({
        status: 200,
        body: CHARACTERS
      }));

      observer.complete();
    });
  }
}

In general, an HttpInterceptor allows examining and modifying the HTTP request before passing it back to Angular’s HTTP service. As a common use case, they might be used to add authentication headers to every request, or to alias shorter URL to much longer ones. As already mentioned, in case of this project it is used to mock the HTTP requests towards the back-end service.

Interceptors have only one method

intercept(req: HttpRequest<any>, next: HttpHandler): Observable<HttpEvent<any>>

which returns an Observable and takes two arguments. The former is the HttpRequest itself, while the latter is the HttpHandler used to dispatch back the next request in a stream of requests.

The implementation is straight-forward – in case of GET requests towards /api/v1/characters (the same one used in the CharacterService), an observable containing a HTTP 200 status and the CHARACTERS array as body is returned, otherwise it is returned with no changes.

In order to put the interceptor in force, it needs to be wired inside the app.module.ts, in the providers array.

import {HTTP_INTERCEPTORS, HttpClientModule} from '@angular/common/http';
import {CharacterServiceInterceptor} from './mocks/character-service-interceptor';

@NgModule({
  declarations: [
    AppComponent,
    CharacterListComponent,
    CharacterComponent
  ],
  imports: [
    BrowserModule,
    AppRoutingModule,
    HttpClientModule
  ],
  providers: [
    { provide: HTTP_INTERCEPTORS, useClass: CharacterServiceInterceptor, multi: true}
  ],
  bootstrap: [AppComponent]
})
export class AppModule { }

This second mocking approach is way better than the previous one as it allows having the service as close as possible to its final version, while pretending the responses are coming from a real back-end.

The source code for this stage is here – https://github.com/horatiucd/ninjago-front-end/tree/v3.0.0.

Mock using a HttpXhrBackend mock

In order to trigger HTTP calls from Angular, usually a real endpoint is needed – the previously referred back-end. Since Angular has a powerful dependency injection engine and the codebase is constructed upon it, this can be leveraged to replace the HttpXhrBackend class that handles the HTTP calls and set-up a mock for it to simulate these.

In order to accomplish this, the HttpBackend class is extended. According to the documentation, this HttpHandler dispatches the requests via browser HTTP APIs to a backend. Interceptors sit between the HttpClient interface and the HttpBackend. When injected, the HttpBackend dispatches requests directly to the backend, without going through the interceptor chain.

As part of the /mocks directory, MockHttpBackend is added – mock-http-backend.ts

HttpBackend has one abstract method

handle(req: HttpRequest<any>): Observable<HttpEvent<any>>

that returns an Observable and takes the HttpRequest as argument.

The implementation is similar to the one used in the interceptor. In case of GET requests towards /api/v1/characters, an observable containing a HTTP 200 status and the CHARACTERS as body is returned.

import {HttpBackend, HttpEvent, HttpRequest, HttpResponse} from '@angular/common/http';
import {Observable} from 'rxjs';
import {Character} from '../character/character';
import {CHARACTERS} from './characters';

export class MockHttpBackend implements HttpBackend {

  private readonly GET_CHARACTERS_URL = '/api/v1/characters';

  handle(req: HttpRequest<any>): Observable<HttpEvent<any>> {
    if (req.url === this.GET_CHARACTERS_URL && req.method === 'GET') {
      return this.getCharacters();
    }
  }

  private getCharacters(): Observable<HttpResponse<Character[]>> {
    return new Observable<HttpResponse<Character[]>>(observer => {
      observer.next(new HttpResponse<Character[]>({
        status: 200,
        body: CHARACTERS
      }));

      observer.complete();
    });
  }
}

This allows building the CharacterService to use the Angular HTTP service and not require a separate API to call. Basically, by leveraging Angular DI architecture, the default HttpXhrBackend class can be replaced with the mock class.

In app.module.ts, both HttpXhrBackend and MockHttpBackend (the mocked type) need to be imported and also registered in the providers array of the @NgModule decorator.

import {HttpClientModule, HttpXhrBackend} from '@angular/common/http';
import {MockHttpBackend} from './mocks/character-service-mock-backend';

@NgModule({
  declarations: [
    AppComponent,
    CharacterListComponent,
    CharacterComponent
  ],
  imports: [
    BrowserModule,
    AppRoutingModule,
    HttpClientModule
  ],
  providers: [
    { provide: HttpXhrBackend, useClass: MockHttpBackend }
  ],
  bootstrap: [AppComponent]
})
export class AppModule { }

Basically, when a HttpXhrBackend is needed, an instance of a MockHttpBackend is used.

The source code for this stage is here – https://github.com/horatiucd/ninjago-front-end/tree/v4.0.0

In my opinion, the 3rd option is the most convenient one, as it allows having the services that use the HttpClient in their final form and under the hood, the calls to the backend are responded from the mocked HttpXhrBackend.

Once a real back-end is available, it is very easy to switch and use it instead.

Managing Releases with Git

by Horatiu Dan

This post briefly outlines a simple, yet clean process for managing the releases of an application via Git / GitHub. Its goal is to provide a straight-forward recipe, while it is assumed the fact that these practices may vary from situation to situation, from team to team, from project to project.

Set-up

The subject is a small project whose source code resides in GitHub. Details on how it was created and synced into the source repository may be found here (Starting an Angular Project).

The application main branch is https://github.com/horatiucd/ninjago-front-end. The current state of this branch might be different now as the project has evolved.

Creating a Release

Assuming the current state of the application’s main branch is in line with what was aimed to be its first version, the following operations may be done in order to be ready to release it:

  • a new branch is created from main – v1.0.0 – and checked out.
> git checkout -b v1.0.0

From now on, this branch will be the ‘source’ of version 1.0.0 releases. Moreover, it will help when fixing issues (bugs) or adding enhancements for this version.

  • sync the branch to GitHub
> git push origin v1.0.0
  • create a new tag having as target the v1.0.0 branch – release-v1.0.0.

This may be done in two ways, either from the IDE and then pushed to the remote repository or created directly in GitHub. In the former case, the tag is available among the GitHub Tags section and may be used when a release is created.

  • create the actual release, provide a name in accordance with the convention used and details on what this version actually contains

Once this is fulfilled, an archive file (zip and tar.gz) containing the project code is available – ninjago-front-end-release-v1.0.0.

  • publish the release

The newly made release is visible in GitHub – releases section.

Application Evolution and Maintenance

In case an issue is discovered or an enhancement is wanted in a certain version (e.g. 1.0.0), the recommended approach is the following:

  • make the code modification(s) in release branch (e.g. v1.0.0)
  • merge the modification(s) into main and all newer version branches
  • release from each version branch as desribed in the previous sections

As the main branch is usually the most current one, in case a new version is wanted to be released, the steps mentioned above are applicable.

Use-case

  • main evolves
  • a fix is needed in v1.0.0
  • the fix is done and a new release is made – release-v1.0.1
  • the fix is ported to the main branch as well

Use-case log of actions

  • the main branch is being modified, the application evolves – this is an ongoing action
  • at some point, a bug is found in version 1.0.0 – e.g. the main page should display ‘Ninjago App is running!’ instead of ‘Ninjago App app is running!’
  • create an issue branch from v1.0.0 one and check it out
> git checkout -b issue1-v1.0.0
  • fix the issue, commit to local branch, push to remote repository
> git commit -m "Fixes the display issue in the main page."
> git push origin issue1-v1.0.0
  • create a Pull Request in GitHub – from issue1-v1.0.0 towards v1.0.0

  • have the changes reviewed and approved

  • merge the pull request into the v1.0.0 branch – easily doable from GitHub

  • make a new release from v1.0.0 branch

Follow the steps indicated in the above section:

  1. checkout v1.0.0 branch
  2. create a new tag on branch v1.0.0 – release-v1.0.1
  3. create and publish the actual release – Ninjago v1.0.1
  • local and remote issue1-v1.0.0 branches may be now deleted
  • merge the fix into the main branch so that the next versions will be up-to-date (either by cherry-picking or merging) and push the changes to the remote repository
> git checkout main
> git cherry-pick 04c97e5dd6c6019d502d94186201493c3020bdf1

or

> git merge v1.0.0
> git push origin main

The visual git log for all the aspects described is below.

Summing Up

Although simple and straight-forward, I find this brief recipe useful especially for small sized projects and teams, but not only.

Next step – automate the release process.

Starting an Angular Project

by Horatiu Dan

In order to be able to begin developing a new project using Angular, one shall follow a couple of simple steps, described as part of this blog post. In addition to the set-up, the post will briefly explain how a project is generally structured and what actually happens in the very moment it is started.

Pre-requisites

As for every technology, certain pre-requisites (tools) are to be installed first.

Node.js

Node.js is a very popular platform that allows running JavaScript code outside the browser. Differently put, a JavaScript file can be run from the command line.

It ca be downloaded from https://nodejs.org and installed locally very easily by following the steps. For this project version 14.16.0 is used. The version can be checked with the following command.

> node -v
v14.16.0

NPM

Once Node.js is installed, NPM shall be present as a couple of libraries are needed in the project.

NPM is a package manager for Node.js that allows installing such libraries easily.

It can be installed using the command line:

> npm install -g npm@latest

for the latest version, or

> npm install -g npm@6.14.11

for a particular one.

Version may be checked with the following command.

> npm -v
6.14.11

Angular CLI

Angular CLI installation is straight-forward. In a terminal window, one may issue

> nmp install -g @angular/cli

for the latest version, or

> npm install -g @angular/cli@9.1.15

for a particular one.

Once installed, ng commands may be used for Angular related tasks.

> ng version

Angular CLI: 9.1.15
Node: 14.16.0
OS: win32 x64

Angular: 9.1.13
... animations, common, compiler, compiler-cli, core, forms
... platform-browser, platform-browser-dynamic, router
@angular-devkit/core              9.1.15
@angular-devkit/schematics   9.1.15
@angular/cli                            9.1.15
@ngtools/webpack                  9.1.15
@schematics/angular               9.1.15
@schematics/update                0.901.15
rxjs                                           6.5.5
typescript                                 3.8.3
webpack                                  4.42.0

Generating the Project

By issuing

> ng new ninjago-front-end

and answering [Y] to routing and [CSS] to the css format, the project having the ‘ninjago-front-end’ name is generated using the CLI.

> cd ninjago-front-end
> ng serve 

or

> npm start

tarts the application which may be accessed in the default location – http://localhost:4200/.

This is basically all that is needed in order to have an empty Angular project.

It is worth mentioning that such a project may be started directly from an IDE (IntelliJ for instance) which will execute the same CLI commands, but in a more ‘visual’ manner.

High Level Angular Project Structure

Once created, an angular project contains a great deal of files, mostly configuration ones. The src folder encloses the code as follows:

  • app – contains all of the component(s) code

app.component represents the root component in the application that will contain the rest of the components that are defined.

  • app.component.css – the component specific styling
  • app.component.html – the HTML, the actual component DOM
  • app.component.spec.ts – the tests of the component
  • app.component.ts – the TypeScript file that defines the data that is displayed in the component as well as the corresponding logic, behavior

All components in Angular consist of these files.

app-routing.module.ts – defines the application routing logic

app.module.ts – contains the declarations of all used modules in the application

  • assets – things the project needs – images etc.
  • environments – contains files for specifying different environment variables (useful when having multiple ones as development, production etc.)
  • index.html – the single file the application is rendered into
  • main.ts – the application entry point
  • polyfills.ts – contains the special packages to be imported for browser compatibility
  • styles.css – contains the global styling of the application
  • test.ts – launches the application testing

Among the above mentioned configuration files, the following are worth mentioning:

  • angular.json – contains project-specific configuration defaults used for build and development
  • karma.conf.js – contains the testing default configuration
  • package.json – contains the project dependencies

Behind the Scene

When the Angular application is started – using ng serve command – the following happens:

  • main.ts entry point bootstraps AppModule module (defined in app.module.ts)
platformBrowserDynamic().bootstrapModule(AppModule).catch(err => console.error(err));
  • AppModule bootstraps the application root component – AppComponent – defined in app.component.ts file
@NgModule({
	  declarations: [
		AppComponent
	  ],
	  imports: [
		BrowserModule
	  ],
	  providers: [],
	  bootstrap: [AppComponent]
})
export class AppModule { }
  • AppComponent renders app.component.html in the app-root selector (tag) as part of index.html, in accordance with the app.component.css styles.
<!doctype html>
<html lang="en">
<head>
  <meta charset="utf-8">
  <title>NinjagoFrontEnd</title>
  <base href="/">
  <meta name="viewport" content="width=device-width, initial-scale=1">
  <link rel="icon" type="image/x-icon" href="favicon.ico">
</head>
<body>
  <app-root></app-root>
</body>
</html>

Running the Unit Tests

During development, it’s a good habit to write unit tests to increase confidence, maintainability and robustness of the application. Fortunately Angular (TypeScript) allows defining such unit tests as specs.

They can be always executed by issuing the following command

> ng test

which launches a built-in Karma server and a browser and executes the existing specs.

Sharing the Project

Now that the project was created and analyzed, it can be uploaded to GitHub so that it can be further enhanced. This operation is straight-forward.

After logging in, a new repository is created – https://github.com/horatiucd/ninjago-front-end.git

Locally,

> git remote add origin https://github.com/horatiucd/ninjago-front-end.git
> git branch -M main

Then push to the central repository main branch either using the command line or directly from the IDE.

As the project evolved, branch v1.0.0 better illustrates what is needed here – https://github.com/horatiucd/ninjago-front-end/tree/v1.0.0.

Resources

  • Angular Documentation – https://angular.io/docs – personally I find it as one of the most accurate and well written documentation of a product.